
Don't ask me why, but I bought a million bananas right before Thanksgiving??? I guess I thought I would make more banana cream pies than I ended up making. I don't want to waste them, so I have been on the hunt for some banana recipes and I found this recipe. I LOVE anything with streusel. All you have to do is say the word "streusel" and I am sold! Nancy said she had almost given up on streusel banana breads until she found this recipe.
I usually have a hard time with banana bread, because I only like it the day it is made, because I hate it when the top gets all sticky (I know that is most peoples fave part), but since the top of this bread is covered with streusel, I don't have to worry about it getting sticky. Today is only the 2nd day, but the streusel is still crunchy and the bread is still really moist. This bread has really good flavor and texture and was a great recipe to try. I even think it would taste great with some wheat flour too.


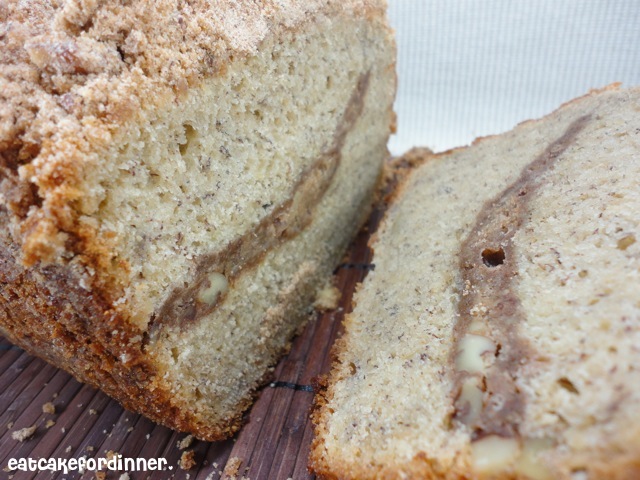
Cinnamon Streusel Banana Bread
adapted from: Nancy Creative
1 1/2 c. mashed ripe banana (about 3 large)
1 c. sugar
1/2 c. butter, melted
2 eggs
1 tsp. vanilla extract
2 c. all-purpose flour
1 1/2 tsp. baking powder
1/4 tsp. baking soda
1/4 tsp. salt
1/2 tsp. cinnamon, opt.
3/4 chopped walnuts (I didn't add)
Streusel
2/3 c. brown sugar
1/2 c. all-purpose flour
1/2 tsp. cinnamon (I added 1 tsp.)
4 Tbl. cold butter
1/2 c. chopped walnuts (I used pecans)
Preheat oven to 350 degrees. Beat together mashed banana, sugar, melted butter, eggs and vanilla. In a separate bowl, combine flour, baking powder, baking soda, salt and cinnamon. Add dry ingredients to wet ingredients and blend until just combined. Make the streusel: combine brown sugar, flour, cinnamon and chopped walnuts. Cut in the cold butter until resembles coarse crumbs. Grease loaf pan and spoon half the bread batter into the bottom, then sprinkle half of the streusel over the batter. Then, gently spoon on remaining batter and top with remaining streusel. It will be full to the top of the pan. Bake 60-70 minutes (mine took more like 85 minutes) or until a toothpick comes out clean. Makes 1 loaf.
Jenn's Notes: I was going to tell you to cut back on the streusel, because I thought it would be too much, but when you slice the bread a lot of the streusel falls off the top, so it ends up being perfect. When you are adding it to the batter - it will seem like tonz, but it ends up working out. I lined my loaf pan with a little parchment paper that extended over the edge of the pan, so when my bread was done I could easily lift it out of the pan by the paper handles. If you didn't do that I am not sure how you would get it out of the pan without all of the topping falling off. The batter was full to the top of my pan and I was afraid it was going to overflow, so I baked it over a cookie sheet, but it did not overflow. My loaf took way longer to bake than suggested.


