Showing posts with label Rolls. Show all posts

Saturday, November 23, 2013

10 Roll Recipes for Thanksgiving

Since Homemade Rolls are the most important part of Thanksgiving Dinner :) I put together a list of 10 delicious recipes for you (in no particular order).  I have made Roll #8 Our Best Bites' Dinner Rolls for the past two Thanksgivings and everyone loves them.

Monday, November 11, 2013

No-Knead Make-Ahead Honey Butter Dinner Rolls

You guys, this is a fabulous roll recipe for Thanksgiving.  You can make the dough the night before.  One less thing to worry about the day of.  

This recipe comes from the ever-so-talented Averie, the same Averie that has an incredible book dedicated to peanut butter - love it :)

I baked a batch of these honey butter smothered rolls the first night and I tried a batch the next morning, after refrigerating the dough overnight.  They were both delicious, but honestly, I liked the 2nd batch better.  They are soft and light.

These rolls are definitely the way to go if you are new to roll making or even if you want to cut back on the stress of making a million dishes Thanksgiving day.  I mean really . . . you mix the dough with a wooden spoon after all.  

You don't need a mixer, you don't have to knead the dough for more than a few seconds and you don't have to roll out the dough to cut into rolls.
I woke up Sunday morning, got my other half of dough out of the fridge.  Formed into balls and placed in a warm oven for a quick-rise method.  I watched 1 1/2 cooking shows and by that time, the rolls had risen and were ready to bake.  Within an hour and a half of waking up, you can have a warm honey butter roll in your hand and the scent of fresh baked bread roaming throughout your house with very little hands on time.  SO STINKIN EASY.   

I do have another Overnight Dinner Roll Recipe that is delicious too, if you want to have a couple recipes on hand.
Honey Butter Dinner Rolls
adapted from: Averie Cooks
(Printable Recipe) or (Printable with Picture)

7/8 c. water (scant 1 cup), warmed
2 1/4 tsp. instant or active dry yeast
2 large eggs
1/4 c. canola or vegetable oil
1/4 c. honey
pinch of salt
3 1/4 - 3 1/2 c. all-purpose flour

Honey Butter
1/4 cup (4 Tbl.) unsalted butter, softened
2-3 Tbl. honey

Pour warm water into a large mixing bowl and sprinkle the yeast over the top (I also add a pinch of sugar or a small amount of honey to help activate the yeast).  Allow to sit for 5 minutes.  It should be very frothy and bubbly.  If it isn't, then start over.  

Add the eggs, oil, honey and salt and whisk to combine.  Add 3 cups of flour and stir with a wooden spoon until combined.  Add up to 1/2 cup of additional flour, as needed.  Dough should be slightly sticky to the touch and it should pull away from the sides of the bowl as you stir.  Stir dough for one minute.  It will be thick and lumpy.  Form dough into a ball in the center of the bowl.  Cover with plastic wrap and place in a warm, draft-free, place to rise until doubled, about 2 hours.  

At this point you have two options.  
If you plan to bake now: Punch down dough, remove it from the bowl and turn out onto a floured surface.  Knead it only so much as necessary to shape it into balls for rolls (about 15-20 seconds).  Cut dough in half and cut each half into 8 pieces.  You will get 16 rolls total (around the size of a golf ball or slightly larger).  Place balls in a greased baking dish.  9 rolls will fit in an 8x8-inch baking dish.  Allow to rise until doubled, about 1 hour.  For the honey butter: combine butter and honey and stir together until smooth and creamy.  Carefully put a small dollop on top of each roll.  As they bake, the honey butter will melt all over the roll.  Bake at 350 degrees for 18-20 minutes.  Tops will be lightly golden.  Serve with remaining honey butter.

If you plan to bake another time:  After dough has risen two hours, punch down and cover with plastic wrap. Refrigerate up to 5 days.  When ready to bake, remove from the refrigerator and form into 16 balls.  Place dough balls into a greased baking dish.  9 rolls will fit in an 8x8-inch dish.  Allow to rise until doubled.  For the honey butter: combine butter and honey and stir together until smooth and creamy.  Carefully put a small dollop on top of each roll.  As they bake, the honey butter will melt all over the roll.  Bake at 350 degrees for 18-20 minutes.  Tops will be lightly golden.  Serve with remaining honey butter.                 

Jenn's Notes:  I like to let my dough rise in a warm oven to speed up the process.  I turn my oven on to 350 degrees and allow it to heat for a few minutes, then I turn off the oven and place the rolls inside.   

Warm Water Tip: I hold my hand under the running tap water.  It should be very warm, but not so hot that you have to pull your hand away.  I always make sure the yeast is bubbly and frothy before I add any other ingredients.   

Linked up at Weekend Potluck! and Tuesday Talent Show!

Sunday, March 31, 2013

Easy Overnight Dinner Rolls

I obviously eat A LOT of bread.  

I am a CARB LOVER.

By now, you are probably thinking I should have named my blog "Eat Bread for Dinner."  

I have loved bread since I was a little girl.  The rolls were always the first thing I would pick at any dinner table.  I love bread in every which way, shape and form. 

I frequently get asked if any of my roll recipes can be made the night before and placed in the refrigerator to rise overnight.  I have never tried that with any of my previous rolls, but I did try it with this new recipe.

You don't even need a mixer to make these.    

I thought these rolls were delicious.  They are so extremely soft and tender and the butter gives them an amazing flavor.

I am horrible at cutting the circles into 16 even pieces, but in the end, it didn't even matter.  Once the rolls rise, you can't tell if some are slightly larger than others.  
Easy Overnight Dinner Rolls
1 Tbl. active dry yeast
1/2 c. sugar
1 c. warm water
3 eggs, beaten
1/2 c. butter, melted, plus 2 Tbl.
1/2 tsp. salt
4 c. all-purpose flour, more or less


Combine yeast, sugar and warm water in a large bowl.  Allow to sit for five minutes.  It should be bubbly and frothy.  If it does not get bubbly and frothy, start over.  Add the beaten eggs, 1/2 cup melted butter and salt.  Using a wooden spoon, stir in three cups of flour.  Gradually stir in the remaining one cup of flour.  You might not need the full cup or you might need slightly more.  The dough should be soft and slightly sticky to the touch and will pull away from the side of the bowl as you stir it.  Do not knead the dough.  

Cover bowl with plastic wrap and allow to rise 4-6 hours or overnight in the refrigerator.  Turn out dough onto a lightly floured surface and divide in half.  Roll each half of dough into a circle.  Brush each half with 1 Tablespoon of melted butter and cut into 16 pieces, like a pizza.  Roll up each piece from the large end to the point and pinch tip to seal.  Place rolls on a cookie sheet and allow to rise for 30-60 minutes or until doubled in size.  Preheat oven to 375 degrees and bake for 8-10 minutes or until golden.  Makes 3 dozen rolls.

Jenn's Notes: I mixed together the dough and refrigerated it overnight.  I removed it from the fridge about an hour before I rolled it out and the dough was still cold which made rolling very easy.  I thought these were delicious.  

Thursday, February 28, 2013

French Bread Rolls

I had a whole, nice, detailed post typed up about these rolls.  Then, something really strange happened.  I must have clicked some kind of button or link, because my whole post was gone and it was replaced by another post?  WEIRD?  Undo wouldn't do anything, so I was S.O.L.

Now, all I feel like saying is these rolls are delicious.  The inside is super soft and the outside is slightly chewy.  Serve them plain, smothered in butter or use as a bun for sandwiches.  They didn't necessarily "scream" French Bread to me, only because the crust was slightly different.  Nonetheless, the flavor was outstanding and I will make them again. 
French Bread Rolls
adapted from: Mel's Kitchen Cafe

1 1/2 c. warm water
3/4 Tbl. instant yeast
2 Tbl. sugar
2 Tbl. canola oil
1 tsp. salt
4 c. all-purpose flour, more or less

In the bowl of a stand mixer, combine the warm water, yeast, sugar, canola oil and salt.  Mix in 2 cups of flour.  With mixer on, gradually add remaining flour, as much as needed, until the dough has pulled away from the side of the bowl.  It should be soft and smooth and slightly tacky to the touch.  Knead the dough until very smooth and elastic, about 5 minutes.  Cover and let rise until doubled, about 1 hour.  

Punch down dough and turn out onto a lightly greased counter.  Divide into 12 equal portions and form into balls.  Place on a baking sheet and cover.  Let rise until doubled, about 45 minutes.  Preheat oven to 400 degrees.  Bake for 12-14 minutes or until lightly browned and cooked through.  

Jenn's Notes: I baked my rolls for 16-17 minutes and they were perfect.  I brushed the tops with a little butter right when they came out of the oven.  

Thursday, January 17, 2013

Kelsey's Orange Rolls from Rapid Rise Roll Dough

These rolls turned out great.  The frosting is amazing and I could eat it by the spoonful.  I used this Rapid Rise Roll Dough that I posted the other day and they came together in no time.  Such a fast and easy orange roll that turned out so good.  The roll is soft and flaky and chewy and has an amazing orange flavor.  

I decided the secret to a good orange frosting is adding the orange zest.  That zest sure kicks up the flavor. 

Make these this weekend! 
Kelsey's Orange Rolls
adapted from: Kelsey Nixon
(Printable Recipe) or (Printable with Picture)

Rapid Rise Dough
3 (.25 oz.) packets active dry yeast (about 2 Tbl. + 1 tsp.)
1 3/4 c. warm water
1/2 tsp. sugar
1/2 c. honey
1/2 c. melted butter, plus more for brushing
2 tsp. salt
2 large eggs, beaten
4-6 c. all-purpose flour, plus more if needed

Orange Filling
3/4 c. sugar
zest of 1/2 an orange
2 Tbl. fresh orange juice (1/2 an orange)
4 Tbl. unsalted butter, softened

Orange Frosting
2 c. powdered sugar
4 Tbl. unsalted butter, softened
2 Tbl. fresh orange juice (1/2 an orange)
zest of 1/2 an orange

In the bowl of a stand mixer, fitted with the paddle attachment, combine the yeast, warm water and 1/2 teaspoon of sugar.  Let it activate for 5 minutes until bubbly.  If it does not get bubbly, start over.  Stir in the honey.  On low speed, add 1/2 cup of melted butter, salt and eggs and mix until well incorporated.  Slowly add the flour, one cup at a time, until fully incorporated and the dough pulls away from the sides of the mixing bowl.  Add more flour if it is too sticky.  Cover bowl with a towel and allow to rise approximately 20 minutes or until doubled.  Roll out dough onto a lightly floured surface to a 15x11'' rectangle.  

For the filling: combine sugar, orange zest and orange juice and mix until incorporated.  Spread softened butter over dough and top with orange filling mixture, leaving a 1/2'' border around the edge.  Starting with the long side, roll up as tightly as possible.  Pinch seam to seal.  Cut into 18 slices, about 1/2'' thick.  Place in 2 (9x13-inch) greased pans and cover with a kitchen towel.  Allow to rise about 20 minutes or until doubled in size.  

Bake in a preheated 375 degree oven until tops are golden, about 15-20 minutes.  Remove from oven and brush tops with melted butter.  Combine all frosting ingredients and mix until smooth and creamy.  Either spread over the warm rolls for an icing or spread on cooled rolls for a frosting.  Yield: 18 rolls.  

Jenn's Notes: I made half a batch of the rapid rise dough and used 3 cups of flour total.  I made some into regular rolls and the rest into orange rolls.  I cut my orange rolls thicker than 1/2'', because I wanted big rolls.  I baked for 20 minutes and allowed them to cool completely before I added the frosting.  These are delicious.   

Tuesday, January 15, 2013

Kelsey's Rapid Rise Rolls

The flavor of these rolls is outstanding.  The outside was perfectly chewy and the inside was so soft and delicate.  I was wishing I would have made the entire recipe rather than cutting it in half, because I wanted all of these rolls to MYSELF!  Sorry family . . . you don't get bread with your dinner tonight :) 
No . . . I shared.  I had to make sure everyone else thought they were as good as I did.  It was a unanimous decision that these were delicious.  These are a must to try.

P.S.  Just incase you are wondering, I used a small skillet since I made a small batch and that is why there are only seven rolls in the pics.  A regular-size skillet should not have any problem fitting 12 rolls.

Kelsey's Rapid Rise Rolls
3 (.25 oz.) packets active dry yeast (about 2 Tbl. + 1 tsp.)
1 3/4 c. warm water
1/2 tsp. sugar
1/2 c. honey
1/2 c. melted butter, plus more for brushing
2 tsp. salt
2 large eggs, beaten
4-6 c. all-purpose flour, plus more if needed

In the bowl of a stand mixer, fitted with the paddle attachment, combine the yeast, warm water and 1/2 teaspoon of sugar.  Let it activate for 5 minutes or until bubbly.  If it does not get bubbly, start over.  Stir in the honey.  On low speed, add 1/2 cup of melted butter, salt and eggs and mix until well incorporated.  Slowly add the flour, one cup at a time, until fully incorporated and the dough pulls away from the sides of the mixing bowl.  Add more flour if it is too sticky.  Portion the dough into 24 even servings.  Form the rolls into desired shape and place into two greased cast iron skillets or on a baking sheet spaced evenly apart.  Set aside, cover with a towel and allow to rise approximately 20 minutes or until doubled in size.  Brush the rolls with melted butter.  Preheat oven to 400 degrees and bake for 25 minutes.  Remove from the oven and brush with more melted butter.  Yield: 24 rolls.

Jenn's Notes: I made half a batch and used 3 cups of flour total.  I made some into regular rolls and the rest into orange rolls.  I used my kitchen scale and made each roll 2 ounces and formed them into round balls.  Mine took longer than 20 minutes to rise, but my house was fairly chilly.  I baked for 25 minutes, but probably could have went 23-24 minutes.  I thought these rolls were delicious!    

Thursday, October 18, 2012

Bread Machine Dinner Rolls

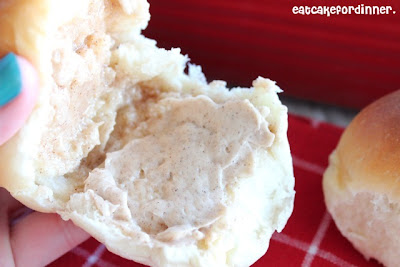
I have made these rolls a few times.  The first time, I baked them the time suggested (13 minutes) and the insides were dough balls still.  I tried again, baked an extra few minutes, and they were great.  Serve them with Cinnamon Honey Butter and they will disappear in no time. 
These are a great "Beginner Roll", because they are so easy to make since the bread machine does all the work.  Wake up, throw the ingredients in the bread machine,  hop in the shower and get ready for the day, shape the rolls, let them raise, bake and enjoy.  Simple enough?      
Bread Machine Dinner Rolls
(Printable Recipe) or (Printable with Picture)

1 c. warm milk (I used 1%)
1/4 c. (4 Tbl.) unsalted butter, softened
1/4 c. sugar
2 eggs, lightly beaten
1 1/2 tsp. salt
4 c. bread flour
2 1/4 tsp. instant yeast

Place ingredients in the bread machine in the order suggested by manufacturer.  I added mine in the exact order the recipe is listed, starting with milk and ending with yeast.  Once you add the flour, make an indent in the top and add the yeast to that pocket.  Select dough setting (mine takes 1 1/2 hours) and let the bread machine work its magic (check the dough after five minutes to see if 1-2 Tablespoons of water or flour is needed).  Mine was perfect and I didn't have to add any extra ingredients.  When cycle is done, turn dough out onto a lightly floured surface and punch down to get rid of air-bubbles.  Divide dough into 24 even-sized pieces; shape each into a ball and divide between two greased 9x13-inch pans (12 rolls per pan).  Cover and let rise in a warm place 30 minutes or until doubled.  Bake at 375 degrees for 17-20 minutes or until golden.  Remove from oven and rub butter over the top of each roll.

Jenn's Notes: The original recipe called for 1/2 cup (8 Tablespoons) of butter, but since I was planning on serving these with cinnamon honey butter, I didn't want all that extra butter in the dough.  I cut the recipe in half and it worked great.


adapted from: Love Bakes Good Cakes originally from: Taste of Home

Monday, March 19, 2012

School Lunch Lady Rolls - No Mixer Needed - Plus How to Make Perfect Sized Rolls Every Time!

I knew as soon as I saw this recipe, that I had to try it.  It is supposedly a SECRET recipe from an elementary school.  I love secret recipes! It makes it that much more exciting to try. The instructions weren't very detailed, so I am not sure if what I did is exactly what you are supposed to do, but I guess it doesn't really matter, because they turned out DELICIOUS! I may or may not have already eaten four of them in one day. 
This is the easiest way to get perfect-sized rolls every single time (I got this technique from The Lion House). You don't even need a ruler!  Roll out dough.  I rolled mine out to be exactly two pointer finger's high.  Make an "L" with your hand and place it on the corner of the dough.  Using a pizza cutter, cut a horizontal line from the top of your pointer finger all the way across the dough.  Then, cut a vertical line all the way up from the tip of your thumb.  Then, move your hand and line up the corner of your "L" to the vertical line you just cut and cut another vertical line from the tip of your thumb up.  Repeat.  
See, perfect-sized strips the whole way across.  
Take a strip of dough and hold it straight up and down by the corners, swing it up and around towards you.  It will wrap around itself.  Place seam-side down on baking sheet.  Repeat with remaining dough, placing a few inches apart.  The top corners of the dough will stretch out a bit as you flip it and that is what makes the yummy little nubs on the end of the rolls.  If that doesn't make sense, you can always just roll up each strip of dough.       
Allow to rise until doubled.  
Bake.  Remove from oven and take a stick of butter and rub over the tops of the warm rolls.  So easy and so yummy! 

School Lunch Lady Rolls (No Mixer Needed)
adapted from: The Royal Cook

2 1/2 c. warm water
2 Tbl. active dry yeast
2/3 c. sugar
6 - 8 c. all-purpose flour
2 eggs, lightly beaten
1/3 c. shortening, melted
1 1/4 c. powdered milk
1 Tbl. salt

In a large bowl, dissolve yeast in warm water with the sugar; let stand 5 minutes or until frothy.  Add two cups of the flour along with the remaining ingredients.  Stir together with a wooden spoon until combined.  Stir in remaining flour, 1 cup at a time until a soft dough forms.  It will pull away from the sides of the bowl.  Use as little flour as possible, so your rolls will be soft.  Knead dough, by hand, just a few times in the bowl.  Cover and let rise until doubled.  Roll out to 1/2'' thick on a lightly floured surface.  Spread with 2 Tbl. softened butter.  Cut into strips and roll up.  Lay seam side down on greased baking sheet.  Cover and let rise until doubled.  Bake at 350 degrees for 15-20 minutes.  Remove from oven and brush tops with melted butter.  Yield: 32 large rolls.  

Jenn's Notes: I mixed the whole thing with only a wooden spoon!  I made a half a batch and I used around 2 1/2 cups of all-purpose flour and 1 cup of wheat flour.  The dough rolled out beautifully and was so easy to work with.  I got 16 large rolls and baked them for 20 minutes.  They are soft and buttery and have great flavor! Very yummy. They still taste great the 2nd day!    

Wednesday, December 21, 2011

EASIEST ORANGE ROLLS

This was the 2nd recipe I ever posted on this blog!  Since 99.99% of you probably missed it, I figured it deserved another debut!  It is one of my favorite recipes and it is so easy!  

I tried to re-post this recipe a few times, but each time, the rolls were eaten before I had a chance to snap a photo.  This time I threatened, you better save me at least one roll. . . or else!  Seriously, these rolls disappear in no time.  All you have to do is blink and they will be gone! Ha Ha, but seriously! 

I wanted to show you this recipe before Christmas, because I think it would be perfect to have for breakfast or for an afternoon snack or even to serve alongside dinner!  They only take a few minutes of hands-on time, so they won't take away from your Family time on Christmas.      

1.  Dip the tops of the frozen rolls into butter/sugar mixture.  Spray plastic wrap with cooking spray and place over rolls.  This will help keep the rolls from sticking to the plastic wrap when they rise.   Allow to rise for several hours.  
2.  This is what they should look like when they are ready to bake!  Don't worry - when they bake, the orange topping will run down the sides and flavor the entire roll.  Place in preheated oven and bake until done.  Glaze and enjoy!
EASIEST ORANGE ROLLS
from: Jenn@eatcakefordinner

2 Tbl. butter, melted
6 Tbl. sugar
zest of 1 or 2 oranges
12 Rhodes® frozen dinner rolls

Orange Glaze:
2 Tbl. butter, melted
1 c. powdered sugar
juice of 1 orange juice

Combine melted butter, sugar and orange zest in a small bowl.  Dip the tops of the frozen rolls into mixture and place in a greased 9X13 casserole dish, leaving plenty of room between.  Spray plastic wrap with cooking spray and cover the rolls.  Allow to rise for about four hours or until puffed and touching.  Bake at 350 degrees for 13-15 minutes or until lightly golden brown.  Combine all glaze ingredients; whisk until smooth.  Drizzle over warm rolls.  Serve warm or at room temperature.  Best eaten the day they are made. 

Tuesday, September 27, 2011

Easy Cinnamon and Sugar Rolls with Vanilla Icing

I would normally make these rolls with frozen Rhodes roll dough, but when I pulled the dough out of the freezer yesterday, I noticed it had expired back in April (shows how much I use frozen dough)! I already had my heart set on some cinnamon and sugar rolls, so I decided I would try the same technique using these 30 Minute Rolls that I love so much.  They turned out very yummy! They have a different texture than the Rhodes rolls, but they were still delicious and they came together in no time.  I made half of the rolls plain to serve with dinner and the other half these cinnamon and sugar ones for dessert! 
Cinnamon and Sugar Rolls
from: Jenn@eatcakefordinner

12 frozen Rhodes rolls or 1 batch of 30 Minute Rolls
3 Tbl. melted butter
1/2 cup sugar mixed with 1 Tbl. cinnamon

Glaze:
2 Tbl. melted butter
1 c. powdered sugar
a little milk
1 tsp. vanilla extract

If using Rhodes frozen dough:  Take frozen rolls and dip tops in melted butter and then in cinnamon and sugar mixture, place sugar side up in 9x13 pan.  Repeat with remaining dough.  Spray a piece of saran wrap with cooking spray and cover rolls.  Allow to rise for about four hours.  Bake at 350 degrees for about 10-15 minutes.  Drizzle glaze over warm rolls.  

If using 30-Minute Rolls:  Make dough according to recipe instructions.  After rolling into balls, dip the tops into melted butter and then into cinnamon sugar mixture.  Place sugar side up on greased cookie sheet.  Let raise about 15 minutes.  Bake at 400 degrees for 10 minutes or until browned.  Remove from oven and drizzle with glaze.     

Glaze:  Whisk together all ingredients until nice and smooth, adding milk until it reaches desired consistency.  

Saturday, July 30, 2011

30 Minute Rolls and a Giveaway

***Giveaway is now closed***
I have some exciting news for you today! I have been lucky enough to have been given a chance to review Real Mom Kitchen's Cookbook and the publishing company (Cedar Fort Books) has been kind enough to give a copy away to one of my lucky readers!!!  

I have been very impressed with Laura's cookbook so far.  It is one that I could see myself cooking my way through (yes, each and every recipe).  Each recipe uses standard ingredients (nothing weird) and the majority are fast and simple!  Her instructions are numbered and easy to follow.  Not to mention - her photos are amazing!  Some recipes are from scratch while others use packaged ingredients.  She also has several that are exclusive only to her cookbook and you will not find on her blog.  I would recommend this cookbook to any person wanting quick and easy meals!  It will be released on August 8, 2011!      

How To Enter My Giveaway (two possible entries):
1.  For one entry: You must be a follower of Eat Cake For Dinner (on the right hand side of my blog).  If you are already a follower, just leave me a comment and let me know!  If you are a new follower, leave me a comment and let me know!


2.  For a second entry: Visit Real Mom Kitchen and leave me a separate comment with which of her recipes you would most like to try!


Giveaway will end Wednesday, August 3rd at midnight (winner will be selected at random) and the winner will be announced August 4th!  Winner must contact me within 48 hours or a new winner will be selected!  Good Luck to Everyone!  


I was thrilled when I saw that Laura included this 30-minute roll recipe in her cookbook.  I have been making this recipe for a few years now.  I absolutely LOVE them and they are by far the best QUICK rolls I have ever tried.  These are so easy that you can whip them up on a weekday, after work, in no time!  I think this is a no-fail recipe and would be great to try for beginner bread makers!!   
30 Minute Rolls
adapted from: Real Mom Kitchen

1 c. plus 2 Tbl. warm water
1/3 c. vegetable oil
2 Tbl. active dry yeast
1/4 c. sugar 
1/2 tsp. salt
1 egg
3 1/2 c. all-purpose flour

Preheat oven to 400 degrees.  In the bowl of a stand mixer, combine warm water, oil, yeast and sugar; let rest for 5-10 minutes or until frothy and bubbly.  With a dough hook, mix in salt, egg and 2 cups of flour until combined.  Add remaining 1/2 cup flour at a time (dough will be sticky).  Spray your hands with cooking spray and shape the dough into 12 balls.  After shaped, place on lightly greased cookie sheet and let rest for 10 minutes.  Bake for about 10 minutes or until tops are lightly golden.  Yield: 12 good-sized rolls.  You can also use this same dough for cinnamon rolls!      

Sunday, May 29, 2011

Our Best Bites' Dinner Rolls

These have been declared the World's Best Dinner Rolls by the authors of Our Best Bites.  That was a pretty smart move on their part to name their rolls the world's best, because with a title like that, you can't help but give them a try.  Did they live up to that title?  

These were incredible.  They taste just like another roll that I make, that I absolutely love.  They are so soft and very very easy to make.  They were great plain, with butter, with honey and I think they would make a perfect little sandwich with some ham and cheese.  The recipe recommends using whole milk and when I went to the store, I planned on buying whole milk, but the smallest carton they had was a one gallon size and I was planning on cutting the roll recipe in half, so I couldn't justify buying a whole carton of whole milk when I was only planning on using one cup and not knowing of anything else I could make with the whole milk.  So, I didn't buy it and I ended up using 2% and these rolls were amazing.  If they taste even better than this with the whole milk, then I have got to try it, because I was so impressed with these.  I will have to look for some other recipes that require the use of whole milk, so I don't feel bad about buying a carton and so none goes to waste.  

Do you have any delicious recipes that require whole milk?    
Dinner Rolls
adapted from: Our Best Bites

2 c. whole milk*
1/2 c. plus 1 Tbl. sugar, divided
1/3 c. unsalted butter
2 tsp. kosher salt
2 pkgs. (4 1/2 tsp.) active dry yeast
2/3 c. warm water
8-9 c. all-purpose flour, divided
3 beaten eggs

*They recommend whole milk, but if you're in a pinch 2% milk will work, but try to stay away from 1% or skim

Combine milk, 1/2 c. sugar, butter and salt in a medium saucepan.  Heat over medium heat until butter melts into salty-sweet perfection.  Remove from heat and allow to cool to lukewarm (this is really important, because if it is too hot, it will kill the yeast).  

While the milk mixture is cooling, dissolve the yeast and 1 Tablespoon of sugar in warm water.  Let stand about 10 minutes.  If the yeast hasn't bubbled, you'll need to repeat this step with new yeast.

In a large mixing bowl, combine 3 cups of flour and milk mixture.  Beat on low for 30 seconds, scraping sides of bowl constantly.  Add yeast mixture and beat on high for 3 minutes.  Add beaten eggs.  Stir in as much of the remaining flour as needed to make a soft dough.  This dough should be very soft - it will be coming away from the sides of the bowl, but it will still stick to your finger when you touch it.  (If you add too much flour, these rolls will be heavy and dense).  Place the bowl in a warm place and cover with a clean towel; allow to rise until doubled, about 1 hour.

Punch down dough.  Lightly flour your work surface and turn dough out onto surface.  Divide in half.  Spray two 9x13-inch glass pans with cooking spray.  Pat first portion of dough into a rectangle and then cut into 12 equal-sized pieces.  Shape each piece into a ball and place in prepared pan.  Repeat with remaining dough in the second pan.  Cover with a clean cloth and allow to rise in a warm place for about 30 minutes.  When dough has about 15-20 minutes to go, preheat oven to 375 degrees.  Bake for 15-18 minutes or until golden brown.  When done, remove from oven.  Rub a stick of cold butter over the tops of the rolls.  Eat one now while it's still hot!!

Jenn's Notes:  I cut this recipe in half and got 12 rolls.  I used 2% milk, 2 eggs and 4 cups of flour total.  When you are done mixing, the dough is still pretty sticky, but it firms up during the rising process and was very easy to work with.  I used my kitchen scale to ensure that each roll was the exact same size, but if you don't have one of those, don't worry, just eye-ball it.  During the second rise, my rolls took longer than 30 minutes, more like 45 minutes.  So, plan a little extra time, just in case.  These rolls were still delicious and very soft the next day, but I couldn't tell you about the 3rd day, because I didn't have any left!  

***Update - I have made these rolls a lot since this post, at least a few times a month.  They have become my new go-to roll recipe, because they are so easy and turn out perfect every time.  I have made them with both 2% milk and whole milk and I think they are delicious both ways!***
       
i'am author of old country buffet coupons
that give mcdonalds coupons
breakfast coupons you also can find recipe from 
banana nut bread paula deen
almond roca