Showing posts with label My Favorite Sweets. Show all posts

Sunday, February 9, 2014

The BEST Chocolate Cupcakes with Cheesecake Pudding Filling

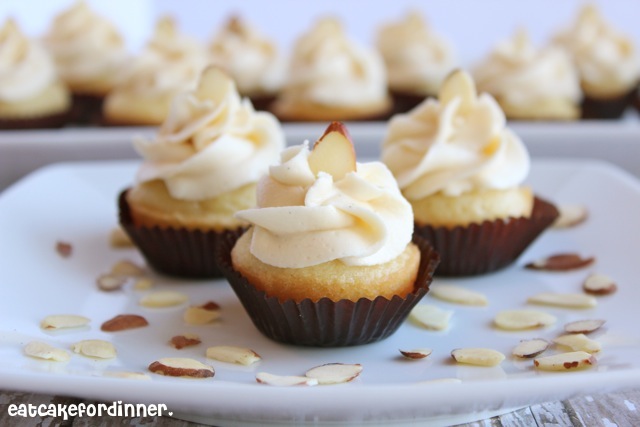
Let's just say my mind is blown!  These cupcakes are one of the best chocolate desserts you will ever put in your mouth.

They remind me of my Mom's Famous Chocolate Sheet Cake in cupcake form and with cream filling.
This is the same Chocolate Cake recipe that I used for My 30th Birthday Cake.  I loved it in cake form and I really love it in cupcake form.  There is no way to resist this amazing eggless cake batter.  At least a recipe with eggs in it keeps you from sampling too much of it before it's baked, but an eggless batter? It was hard to not eat the whole batch of that raw batter by the spoonful.

I made a super rich fudgy frosting to go on top.  At first, I was worried it was going to be too overpowering, but once you combine it with the cupcake and filling, I couldn't imagine a better frosting to go with these super moist cupcakes.
Since the cake and frosting are both rich, I wanted some kind of light vanilla type filling.  Cheesecake pudding popped in my head and it is the PERFECT compliment.  

After tasting it all together, I think you could easily switch up the filling by using a different pudding mix.  I think Strawberry, OREO, White Chocolate, Banana or even just Vanilla would all be divine.

I made a Valentine's Day version and an Every Day version.  With or without sprinkles, you will swoon over these cupcakes.
The Best Chocolate Cupcakes
adapted from: Crazy For Crust
(Printable Recipe) or (Printable with Picture)

*Both the filling and frosting recipes have cooling/chilling time involved.  Make sure to plan ahead.

1 1/2 c. all-purpose flour
1 c. sugar
1/4 c. unsweetened cocoa powder
1 tsp. baking soda
1/2 tsp. salt
1 c. hot water
1/4 c. + 2 Tbl. vegetable oil
1 Tbl. distilled vinegar
1 1/2 tsp. instant coffee granules
1 1/2 tsp. vanilla

Cheesecake Filling:
1 (3.4 oz.) pkg. Cheesecake instant pudding mix
2 c. milk
1 tsp. vanilla extract

Chocolate Frosting:
1/4 c. (4 Tbl.) unsalted butter
3/4 c. sugar
1/2 c. unsweetened cocoa powder
pinch of salt
1 tsp. instant coffee granules
1/2 c. + 2 Tbl. heavy whipping cream (no substitutes)
2 Tbl. sour cream (I used light)
1 tsp. vanilla extract

Preheat oven to 350 degrees.  Line a muffin tin with paper liners and spray with cooking spray.  For the cupcakes: In a medium bowl combine flour, sugar, cocoa, baking soda and salt.  In a separate bowl, combine hot water, oil, vinegar, instant coffee and vanilla; stir together and add to dry ingredients.  Stir until just combined.  A few lumps are okay.  Divide between muffin cups, filling 2/3 full with batter.  Bake for 15-17 minutes or until a toothpick inserted in the center comes out clean and top springs back when lightly touched.  Makes around 12-14 cupcakes.  Allow to cool completely.

For the Filling:  In a medium bowl, combine pudding mix, milk and vanilla and whisk together until combined. Cover and refrigerate for at least 30 minutes before using.

For the Frosting:  Melt butter in a medium saucepan over medium-low heat.  Stir in the sugar, cocoa and instant coffee.  Combine whipping cream, sour cream and vanilla and stir into sugar mixture.  Stir until smooth and creamy (mine had a few small lumps that I couldn't get out).  Continue heating until sugar is dissolved.  Do not boil.  Transfer to a bowl and allow to cool for several hours or until it's thick and fudgy looking.  It will happen, just be patient.

To Prepare:  Use a paring knife and cut a small chunk out of the top center of each cupcake.  Slice off the very top of the chunk, so it's flat (see steps 4, 7, 8 and 9 of this post for a picture tutorial of this process - it's really easy).  Fill cupcake with cheesecake filling and replace top.  Spread chocolate frosting over the top.  Garnish with colorful sprinkles, if desired.  Store cupcakes in the refrigerator.      
Linked up at Weekend Potluck! and Tuesday Talent Show! and Time to Sparkle!

Monday, January 20, 2014

Funfetti Sheet Cake from Scratch in 30 Minutes

 Grammy's White Sheet Cake is one of the most popular recipes here on Eat Cake For Dinner and it is the most requested recipe by family and friends.  

It was time to turn that pretty white cake into a funfetti cake.  I can't believe it took me so long to finally think of doing that.  Funfetti is probably one of the most requested cakes by kids on their birthdays and now you can make it from scratch, feed a bunch of people and not even break a sweat.  
You don't even have to break out the mixer for this recipe.  A whisk is all you need.   

It is such an INCREDIBLE cake and can be made in 30 minutes.   I can mix up the batter in a few minutes, bake it for around 22 minutes, prepare the frosting while it bakes, let it cool for a few minutes, pour on the frosting and BAM . . . you are done :)  The very first time you make this, it might take a little longer than 30 minutes since it is new to you, but I have made this so many times, it's a piece of cake.  However, sometimes I do allow the cake to cool completely before adding the frosting, it just depends on what your schedule allows.   

It tastes great for several days and can easily be made ahead of time. 

You better buy a big container of sprinkles, because you are going to get begged to make this cake over and over again.  
Funfetti Sheet Cake from Scratch
From: Jenn@eatcakefordinner
(Printable Recipe) or (Printable with Picture)

1 c. unsalted butter
1 c. water
2 1/4 c. all-purpose flour
2 c. sugar
1/2 tsp. salt
1 tsp. baking soda
1/2 c. sour cream
2 eggs
1 tsp. vanilla
6 Tbl. sprinkles, plus more for garnish

Frosting:
1 c. unsalted butter
6 Tbl. evaporated milk
4 1/2 c. powdered sugar
pinch of salt
2 tsp. vanilla 

Preheat oven to 375 degrees.  For the Cake: Combine butter and water in a medium saucepan over medium-low heat until the butter is melted.  Meanwhile, combine flour, sugar, salt and baking soda in a medium bowl.  Once butter is melted, whisk into the flour mixture.  Whisk in the sour cream, eggs and vanilla until smooth.  Fold in the sprinkles.  Pour batter into a well-greased 12''x17'' sheet pan.  Bake for 21-22 minutes or until top springs back when lightly touched.  Remove from oven and allow to cool slightly (or cool completely) before adding the frosting.  

For the Frosting:  Add powdered sugar to a medium bowl.  Combine butter and evaporated milk in a small saucepan over medium-low heat until the butter is melted.  Remove from heat and pour over powdered sugar.  Whisk until smooth.  Add the salt and vanilla and whisk until well combined and smooth and creamy.  Pour over slightly cooled cake.  Frosting thickens slightly as it sits.  Garnish with additional sprinkles, if desired.

Jenn's Notes: Recipe can easily be cut in half and baked in a 9x13-inch cake pan. 


Base cake recipe adapted from: Frieda Loves Bread

Sunday, January 12, 2014

Homemade OREOS with Strawberry Cream Cheese Filling

These cookies are so super dangerous.  I am having to practice some serious self-control, because I want to eat the whole batch tonight :)  Yes . . . as in ONE-SITTING.  They are melt-in-your-mouth crazy good.

The chocolate cookie is your standard cake mix cookie which are soft and chewy every time.  The filling has the best strawberry flavor.  In addition to pureed frozen strawberries, I add some strawberry extract for an extra boost of flavor.  You might want to attack the filling with your spoon . . . but try and save some for the cookies, because the chocolate cookie paired with the fresh tasting strawberry filling is a DIVINE combination.

Perfect for a Valentine's Day treat.  

If a cake mix isn't your thing, I have an awesome homemade chocolate cookie recipe too.  Just omit the red food coloring and you are good to go.

BTW - I made these again and took them to work and I have never received so many compliments and recipe requests.  Two people even told me they might be the BEST cookie they have ever had :)  
Homemade OREOS with Strawberry Cream Cheese Filling
From: Jenn@eatcakefordinner
(Printable Recipe) or (Printable with Picture)

1 pkg. chocolate fudge cake mix (or any chocolate cake mix)
3/4 c. shortening
2 eggs

Strawberry Cream Cheese Filling
1 stick (8 Tbl.) unsalted butter, room temp.
4 oz. cream cheese, room temp.
pinch of salt
2 1/2 c. powdered sugar
1/4 c. frozen strawberries in sugar that have been 
    thawed and pureed, plus more if needed
1 tsp. strawberry extract

Preheat oven to 350 degrees.  For the Cookies:  Combine cake mix, shortening and eggs and mix until combined.  Dough will be stiff.  Roll into 1'' - 1 1/2'' balls and place on a greased cookie sheet.  Bake for 9-10 minutes.  Cool completely.  Spread filling over half of the cookies and top each with another cookie to make sandwiches.  Makes about 36 cookies (18 sandwiches).  

For the Strawberry Filling:  Cream together butter, cream cheese and salt.  Add one cup of powdered sugar and mix until combined.  Add the pureed strawberries and strawberry extract.  Gradually mix in the remaining powdered sugar.  If frosting is too thick, add a little more strawberry puree.    

If a cake mix isn't your thing, you can make 1 1/2 batches of this Chocolate Cookie Recipe and omit the red food coloring.

Linked up at Tip Me Tuesday! and Weekend Potluck! and Strut Your Stuff Saturday! and Mega Inspiration Monday!

Monday, July 22, 2013

Camper Crunchies

Note to Self: It is impossible to get anything done with this in the house.

I'm trying to type up this blog post, but I can't stop eating this long enough to even finish a sentence.

These Camper Crunchies are guaranteed to become an instant hit.  My friend Kinzi's family has been making this forever and they take it camping with them every time they go.  She brought it into work one day and it was game over. 

Crunchy Chex cereal is mixed with peanuts and M&M's (or Reese's) and coated in a rich (and easy) caramel sauce.  It's crunchy, it's chewy, it's fast, it's easy and it makes enough to feed a crowd.    
This time around I made half with M&M's and half with Reese's Pieces and I can't decide which one I like better.  Both are AMAZE-BALLS.  I guess it just depends on if you are in the mood for chocolate or peanut butter.  

Make it now, LOVE it forever!
Camper Crunchies
adapted from: Kinzi O.
(Printable Recipe) or (Printable with Picture)

1 c. (2 sticks) unsalted butter
1 c. sugar
1 c. light brown sugar
1 1/2 c. light Karo syrup
1 (14 oz.) box Corn Chex (around 11 cups)
1 c. dry roasted peanuts
1 1/2 - 2 c. M&M's or Reese's Pieces

Add Corn Chex, peanuts and M&M's or Reese's Pieces to a large bowl; set aside.  In a medium saucepan over medium heat, melt the butter.  Add the sugar, brown sugar and Karo syrup.  Stir until sugar is dissolved and bring to a boil; boil for one minute and then pour over cereal mixture.  Fold together until everything is evenly coated in caramel sauce.  Allow to cool.  Stir several times while it is cooling to help prevent the caramel from pooling at the bottom of the bowl and to help it from all sticking together as one big piece.  It will stick together a little once it is completely cooled and you can use the back of a wooden spoon to break it into pieces.  

Jenn's Notes: This also tastes amazing without the peanuts.  Due to adding hot caramel to the bowl, some of the candy will melt.  I don't mind it, but you could always add the candy after you have stirred in the caramel.  

Sunday, May 19, 2013

Aunt Patrecia's Yogurt Pie - No Bake

This was one of my favorite childhood treats and I have so many memories attached to a yogurt pie.

My aunt Patrecia and her family live up in Washington.  When I was younger, we would pile into my Grandma and Grandpa's car and visit them each Summer.  It's probably been 15 years or so since I last went up there.

My cousins and I would have so much fun going boating, riding our bikes, playing video games and just messing around being kids, but . . .

. . . It wasn't all fun and games up there, they would put us kids to work :)  In the front of their house, they had rows and rows of raspberry bushes.  We had to help pick the raspberries in the HOT Summer with bees buzzing around.  I don't know about you, but when a bee flies around me, I become a statue.  I don't even dare blink or I think it will sting me.

As a kid, it seemed like there were millions and millions of never ending raspberries.  

The only good thing was, when we were done, aunt Patrecia would "thank" us with a yogurt pie.
Yogurt pies are DELICIOUS.  The filling is pillowy soft and light and creamy.  All you do is combine yogurt, whatever flavor you like.  You can even mix and match and create your own flavor.  Fold it together with some Cool Whip and spread into the pie crust.  The recipe calls for a graham cracker crust, but you can use a Nilla Wafer crust, shortbread crust, OREO crust or whatever you like.  

ONLY 3 INGREDIENTS and as easy as could be.
This time, I tried Greek yogurt for added protein and fat-free Cool Whip.  It is totally FABULOUS and IRRESISTIBLE.   I would feel good about my kids eating this.  Much healthier than a cream pie, cake or cookies.  You can even use sugar-free Cool Whip if it makes you feel better (I haven't tried a sugar-free version).  

The lighter the Cool Whip you use, the softer the pie will be, but it will still hold its shape just fine, even with fat-free.  You can serve it straight out of the fridge or you can serve it frozen.

Make it, love it!

P.S. this even makes an amazing fruit dip!
Yogurt Pie
From: Aunt Patrecia
(Printable Recipe) and (Printable with Picture)

2 (6 oz.) cartons yogurt, any flavor(s)
1 (8 oz.) tub Cool Whip, thawed
1 graham cracker crust 

Combine yogurt and Cool Whip and very gently fold together.  Spread into pie crust and refrigerate until set, several hours.  Serve with fresh fruit, if desired.


Jenn's Notes: Both Greek yogurt and regular yogurt taste great.  Regular, light and fat-free Cool Whip all work great too.

Saturday, April 6, 2013

Banana Chia Seed Cake with Vanilla Bean Frosting

I don't feel guilty one bit eating a piece of this cake.

Not only does it taste INCREDIBLE, but it is loaded with healthy ingredients too.

 The entire cake (not counting the frosting) only has 2 Tablespoons of butter, not too bad.
Non-Fat Greek yogurt is loaded with protein.
Bananas are loaded with potassium.

Then, there are the Chia seeds!  From what I have read about Chia seeds, they are the new "super food."  What do you think?  Some of the benefits I have read online include:  They are a good source of Omega-3 fatty acids, antioxidants, fiber and a few vitamins and minerals.  I picked mine up in the bulk section and Winco.  It's a hit and miss though, sometimes they are all out. 
Wow - that sounds like a "health food" cake, huh?  Well, it sure doesn't taste like a "health food" cake.

After every bite, I found myself saying "OMG, this is so good."  It was amazing at room temperature and it was amazing straight out of the fridge.

It tastes great for breakfast, lunch or dinner.  Make it, love it!
Banana Chia Seed Cake
(Printable Recipe) or (Printable with Picture)

2 Tbl. unsalted butter, softened
2/3 c. sugar
1 egg
1/2 c. non-fat plain Greek yogurt
1 tsp. vanilla extract
2 ripe bananas, mashed (about 3/4 cup)
1 c. all-purpose flour
1/4 tsp. salt
1/2 tsp. baking soda
3 Tbl. chia seeds

Vanilla Bean Frosting
From: Jenn@eatcakefordinner
4 Tbl. unsalted butter, softened
2 oz. cream cheese
pinch of salt
1 Tbl. vanilla bean paste
   or seeds from 1 vanilla bean
1 1/2 c. powdered sugar
milk, enough to reach desired consistency

Preheat oven to 375 degrees.  For the cake: Cream together butter and sugar until fluffy.  Add the egg, yogurt and vanilla and mix well.  Mix in the mashed banana.  Add the flour, salt, baking soda and chia seeds and stir together just until combined.  Pour into a greased 8x8 baking dish.  Bake for 25-30 minutes or until top springs back when lightly touched and a toothpick comes out clean.  Cool completely and frost.  Store leftover cake in the refrigerator. 

For the frosting: Beat butter and cream cheese until fluffy.  Add a pinch of salt and vanilla bean paste and mix until blended.  Add one cup of powdered sugar and mix until combined.  Add remaining powdered sugar and enough milk, as needed, to reach desired spreading consistency.  Beat until smooth and fluffy and spread over cooled cake.  

Jenn's Notes: This cake is divine.  If you don't want to top it with a thick frosting, a drizzle of my cream cheese icing would be amazing too.  


Banana Cake adapted from: Butteryum

Friday, February 8, 2013

My Go-To Vanilla Cupcakes with Vanilla Bean Frosting

I have posted this recipe before, but as coconut cupcakes.  Ever since then, I have been leaving out the coconut and using this as my go-to vanilla cupcake recipe.  They are more light and fluffy than dense, but they aren't so light that they fall apart.   

This recipe is honestly the best I have found so far (according to my taste).  The best part is that I think these taste better the 2nd day.  Have you ever made a vanilla cupcake that just gets better and better?  I think NOT.  Most cupcakes are best the first day, then they are slightly dry the next day and so on and so on, but not these.  For me, that makes these stress-free, because I know I can make them the day before a party or an event and they will be AMAZING.  No stress the day of.  
The flavor is amazing - thanks to the almond extract.  Almond extract is what makes these not just an ordinary vanilla cupcake.  I recently picked up a giant 16 oz. bottle of it and I know I will have no problem using it up. 

I have not tried this recipe as a cake yet, only regular and mini cupcakes.  When I do get around to making a cake, I will come-back and update.  

BEST EVER :)
Vanilla Cupcakes
3 sticks unsalted butter, room temperature
2 c. sugar
5 eggs
1 1/2 tsp. vanilla extract
1 1/2 tsp. almond extract
3 c. all-purpose flour
1 tsp. baking powder
1/2 tsp. baking soda
1/2 tsp. kosher salt
1 c. buttermilk

Preheat oven to 325 degrees.  Cream butter and sugar until very light and fluffy; about 5 minutes.  Add the eggs, one at a time, beating after each.  Scrape down the bowl.  Add the vanilla extract and almond extract and mix well.  In a separate bowl, sift together the flour, baking powder, baking soda and salt.  In 3 parts, alternately add the dry ingredients and buttermilk to the batter, beginning and ending with the dry.  Mix until just combined.  Line a muffin tin with paper liners and spray with cooking spray.  Fill liners 2/3 full.  For regular cupcakes: Bake 24-25 minutes and yields: 28-30 cupcakes.  For mini cupcakes: Use 1 Tablespoon of batter per muffin cup, bake 10-11 minutes and yields: 100 mini cupcakes. Cool completely and top with frosting.   

Jenn's Notes: These taste good the first day and great the second day.  After that, they slowly start to get a little more dry each day.  

Jenn's Vanilla Bean Buttercream
From: Jenn@eatcakefordinner
2 1/2 sticks unsalted butter, softened
pinch of salt
2 tsp. vanilla extract
1/2 - 1 Tbl. vanilla bean paste
3 c. powdered sugar
vanilla coffee creamer or milk, only if needed

Beat butter until fluffy.  Add the salt, vanilla extract and vanilla bean paste and mix well.  Gradually add the powdered sugar, one cup at a time, beating well after each.  Beat for several minutes or until very light and fluffy.  Add a little vanilla coffee creamer or milk, if needed, to reach desired consistency.  Yields: about 3 cups.

Jenn's Notes: If you want to pipe a big swirl on top of each cupcake, like I did, you might want to make 1 1/2 batches of frosting.  

Wednesday, June 6, 2012

Nutella No Bake Cookies

No Bake Cookies are one of those cookies that I could eat EVERY SINGLE DAY.  I have been eating them as long as I can remember and I still have never gotten sick of them.  The funny thing is, that I had been craving no-bakes for the past few weeks, but I never made them, because I thought - no one wants to see the same old no bake recipe.  Then, last night I found NUTELLA NO BAKE COOKIES!  For real!!!

What a fun twist on an old classic.  I crossed my fingers that I still had enough Nutella left in the jar - oh and I did, but only for a half a batch.  But hey, better than nothing.  They turned out delicious.  So creamy and chewy just how I like them.  We ate these things so fast and I only have one left.  I want to try them with all Nutella and no peanut butter just to see if the hazelnut flavor will stand out a little more.  Either way, they are super yummy.

Nutella No Bake Cookies
adapted from: Shugary Sweets
2 c. sugar
1/4 c. unsweetened cocoa powder
1/2 c. milk
1/2 c. butter
1 tsp. vanilla
pinch of salt
1/4 c. creamy peanut butter
1/4 c. Nutella
3 c. quick-cooking oats

In a medium saucepan, combine the sugar, cocoa powder, milk and butter.  Cook over medium heat, stirring until the butter is melted and sugar is dissolved.  Bring to a boil.  Remove from heat and stir in the vanilla, salt, peanut butter and Nutella.  Last, stir in the oats and quickly drop by spoonfuls onto wax paper.  Allow to harden and enjoy!  

Sunday, April 22, 2012

Rocky Road Brownies

This brownie recipe was one of the first recipes that got me into baking (5 or 6 years ago).  One of my co-workers, Liz, would make these every once in a while and bring them to work for us to munch on.  They were one of the best brownies I had ever eaten.  I was used to store-bought brownies and box mix brownies and had never tried a "from scratch" version.  I was so impressed that a young woman (like myself at the time) could create such a yummy treat.  I was used to Mom's and Grandma's making treats, not young women.  I guess you could say that's what started it all - my foodie obsession!

I started making these weekly, then monthly, then here and there.  Eventually, I kind of forgot about them and moved onto other recipes.  Well, at work the other day, the same day I had chili cheese potatoes, I also had a marshmallow brownie for dessert.  It was chewy, gooey, very rich and was topped with a creamy frosting. 

I just couldn't get over how good they were and I had to find out who made them and get the recipe.  I got the recipe and couldn't wait to make them as soon as I got home.  I decided to check the recipe to Liz's.  It was the exact same recipe, no wonder I LOVED these brownies so much.  I hadn't made them for a few years and had forgotten what was in them.  It reminded me how much I loved them.  The only difference was Liz makes homemade frosting and the ones from work had store-bought frosting.  Whichever you prefer, they will be AMAZING.

If you have never tried a brownie recipe from scratch, let this be the first one.  You never know what/who might come from it! 
Rocky Road Brownies
adapted from: Liz M.
(Printable Recipe)

1 c. melted butter
2 c. sugar
1/3 c. cocoa powder
1 1/2 c. all-purpose flour
2 tsp. vanilla        
1 tsp. salt
4 eggs
chopped walnuts or pecans, opt.
1 (10 oz.) bag mini marshmallows

Icing:
1/2 c. butter, softened
1/4 c. cocoa powder
1/4 c. evaporated milk, more or less
1 tsp. vanilla
3 c. powdered sugar

or

1 container store-bought milk chocolate frosting

Preheat oven to 350 degrees.  Combine melted butter, sugar and cocoa powder.  Add flour, vanilla, salt, eggs and nuts.  Whisk together until completely smooth and well combined.  You can either use a hand mixer or a whisk for this.  Pour into a lightly greased 9x13 pan and bake for 25 minutes.  Remove from oven and top with the marshmallows.  Return to oven and bake for 5 minutes or until marshmallows are puffed up.  Allow to cool and then  spread homemade icing or store-bought frosting over the top.  To make the icing:  Using a hand mixer, beat butter until fluffy.  Add the cocoa powder and vanilla and mix until well combined.  Gradually add the powdered sugar and mix until smooth and creamy, adding evaporated milk as you go to reach desired consistency.       

Thursday, April 12, 2012

Grammy's White Sheet Cake

My mom made this cake for Easter.  We all ate a piece after lunch, plus I took four pieces home that night.  The next day, when I came home from work, all four pieces were gone.  What?  No one even saved me a piece? 
So, I did what any other person would have done. . . I got out the ingredients and made my own cake.  It is so easy to whip up, because you don't even have to get out the mixer.  

You must make this cake.

Then, you must hide it from everyone in your house, because it will disappear if you blink an eye.
  It is so tender and it melts in your mouth, it's buttery, it's extremely moist and it has a delicious rich frosting on top! I love rich desserts and this one hit the spot!  It tasted good with some fresh fruit, but honestly it is perfect served on its own.  

By the way, I made this on Monday night (a half a batch) and it is already GONE.  Not even a crumb is left and I am being begged to make it AGAIN! 


*Update 4/29/12 - I have already made this cake three times since Easter (4/08/12).  It is a family favorite and the only dessert anyone requests lately!*
Grammy's White Sheet Cake
adapted from: Frieda Loves Bread
(Printable Recipe)

1 c. butter
1 c. water
2 c. sugar
2 1/4 c. all-purpose flour
1/2 tsp. salt
1 tsp. baking soda
2 eggs
1 tsp. vanilla
1/2 c. sour cream


Frosting:
1 c. butter
6 Tbl. evaporated milk
4 1/2 c. powdered sugar
1 tsp. vanilla
1/8 tsp. salt
1 c. chopped pecans, opt.

Preheat oven to 375 degrees.  Melt butter and water in a large saucepan over medium-low heat until butter is melted.  Remove from heat and stir in the sugar, flour, salt and baking soda.  Stir with a wire whisk until smooth. Add eggs and vanilla.  Stir in the sour cream and mix until blended.  Pour the batter into a well greased 11''x17'' sheet pan.  Bake for 20-25 minutes or until the cake springs back when lightly touched or a toothpick inserted in center comes out clean.  Remove cake from oven and allow to cool slightly while you make the frosting.  Put the butter and milk into a medium saucepan.  Heat until butter is melted and bring to a simmer.  Remove from heat and stir in the powdered sugar, vanilla and a dash of salt.  Whisk until completely smooth.  Add nuts (if desired) and spread over cake.  

Jenn's Notes: I love this cake.  I tried it with non-fat plain yogurt instead of the sour cream and it was not as rich as it is with the sour cream, but it was just as moist.  By the time I added my frosting, my cake was completely cool.  

Saturday, February 18, 2012

Orange - Almond Biscotti

I was walking down the aisles at Costco a few weeks ago and I wasn't even paying attention to the samples, when one of the ladies said to me, "this goes really good with hot drinks"

I looked over at her and down at the label and it was biscotti.  I have ALWAYS wondered what biscotti tasted like and I finally had a chance to find out.  I grabbed a sample and ate it as I continued walking down the aisle.  I absolutely loved it!  

I couldn't stop thinking about how good it was the entire night.  That just so happened to be the same trip when I picked up a copy of this cookbook.  I was flipping through it and said  . . . please, please have a recipe for biscotti.  

It did! And it was so easy to make!

I have already made it twice in the past few weeks and I will probably make another batch this weekend.  I am seriously hooked.  I absolutely love this version and I can't wait to try out more versions.  I didn't even dip it in anything, I loved it plain, but I do think it would be delicious dipped in milk, coffee or hot chocolate. 

I have since searched for different biscotti recipes and I have found some with butter and some without butter.  What is better?  Well, according to Cook's, the addition of a small amount of butter produces a richer, more cookie-like texture.  They wanted a crunchy, but not tooth-cracking-biscuit full of flavor and they found that the type and quantity of fat dramatically affected the taste, texture and the shelf life of the biscotti.  They also found that biscotti recipes made with whole eggs and no additional yolks got even better with time and remained very crisp.  

What they found must be true, because this stuff is amazing.  It is crunchy, but still has a cookie-like texture.  

I am forever in debt to the Costco Lady who introduced me to biscotti! Ha Ha!
 
1.  Make the dough and form it into a rectangle 

2.  Bake until it just begins to crack on top, about 35 minutes

3.  Let cool for 10 minutes and then cut into slices

4.  Lay cut side up and bake another 15 minutes

Orange-Almond Biscotti
2 c. (10 oz.) all-purpose flour
1 tsp. baking powder
1/4 tsp. salt
4 Tbl. unsalted butter, softened
1 c. (7 oz.) sugar
2 large eggs
3/4 c. whole almonds with skins,                             
    toasted, cooled and coarsely chopped
2 Tbl. grated orange zest
1/2 tsp. vanilla extract
1/4 tsp. almond extract

1.  Preheat oven to 350 degrees.  Line a baking sheet with parchment paper.  Whisk together flour, baking powder and salt together in small bowl.  Using a stand mixer fitted with paddle, beat butter and sugar together at medium high speed until light and fluffy.  Reduce speed to low and add eggs, one at a time, then add almonds, orange zest, vanilla and almond extract until combined, about 30 seconds, scraping down bowl as needed.  Stir in flour mixture until just combined.  

2.  Halve dough and turn each portion onto prepared baking sheet.  Using floured hands (I just sprayed my hands with cooking spray), quickly stretch each portion of dough into rough, 13x2-inch loaf, placing them about 3 inches apart (I just made one large loaf).  Pat each loaf to smooth it.  Bake until loaves are golden and just beginning to crack on top, about 35 minutes, rotating baking sheet halfway through baking. 

3.  Let loaves cool for 10 minutes; reduce oven temperature to 325 degrees.  Cut each loaf diagonally into 3/8-inch slices with serrated knife.  Lay slices cut side up about 1/2-inch apart on baking sheet and return them to the oven.  Bake until crisp and golden brown on both sides, about 15 minutes, turning over each cookie halfway through baking.  Immediately transfer biscotti from baking sheet to wire rack and let cool completely.  

*To toast almonds: Place in preheated 350 degree oven for 8-10 minutes or until very lightly toasted, stirring occasionally.  They can burn very easily, so watch closely.  

Jenn's Notes: The first time I only made a half a batch and I was wishing I had made a whole batch.  So, trust me when I say - make the entire batch or even two batches!  Cook's says this will last, stored in an air-tight container for up to a month, but both of my batches were gone within a few days! Yum.  Orange and almond are a perfect combination and do not skip the fresh orange zest - it adds so much flavor!

Friday, January 6, 2012

Best EVER Chocolate Chip Cookies as seen ALL Over Pinterest

I first saw these cookies over at Project Naptime and then I saw them on another blog and then another and then all over Pinterest.  I could not get away from these cookies, so I gave in and made them.  

These cookies were soooooooooo good! If you like a chewy chocolate chip cookie, then this recipe is made for you!  They are so extremely chewy and soft and buttery and they stay fresh for several days.  We finished off a whole batch of these cookies between the two of us!  This is MY NEW FAVORITE recipe for chocolate chip cookies without oats (I have another favorite one with oats).

The secret ingredient is the cornstarch!  That is what makes them so chewy.   If you have any other recipes saved for chocolate chip cookies that you have been wanting to try, do yourself a favor and try this recipe first!  

Best EVER Chocolate Chip Cookies
adapted from: Anna Olson

3/4 c. unsalted butter, softened
3/4 c. brown sugar
1/4 c. sugar
1 egg
2 tsp. vanilla extract
2 c. all-purpose flour
2 tsp. cornstarch
1 tsp. baking soda
1/2 tsp. salt
chocolate chips, as many as you like

Cream together butter, brown sugar and sugar until light and fluffy.  Add the egg and vanilla and beat to combine.  Combine the flour, cornstarch, baking soda and salt and add to wet ingredients.  Mix to combine and stir in the chocolate chips.  Chill dough for at least 30 minutes.  Preheat oven to 350 degrees.  Use a small cookie scoop and drop dough onto a greased cookie sheet.  Bake 8-10 minutes or until barely golden around the edges.  The key is to NOT overbake.  

If you want crispy cookies, omit the cornstarch and replace the baking soda with baking powder.

**Jenn's Notes Update:  I LOVE these cookies and I make them all of the time.  If the dough looks a little crumbly while mixing, don't worry, it will come together.  I get between 27 and 30 cookies and I bake them for 10 minutes (NO LONGER).  They will look underdone, but they set up perfectly.    

i'am author of old country buffet coupons
that give mcdonalds coupons
breakfast coupons you also can find recipe from 
banana nut bread paula deen
almond roca