Saturday, March 31, 2012

Robin Eggs Malted Milkshake

This is the perfect recipe to have on hand for Easter.  Whether you want to make it right now with the Robin Eggs you already have.  Or if you want to make it after Easter with the extra bags lying around.  Or even if you want to stock up after Easter when the bags are on sale for dirt cheap, then you could make this all year long!  

I recommend making it now, later, the next day and the day after that! It is seriously delicious.  It tastes even better than I imagined it would taste.  It has the malt flavor of a milkshake you would get at the Drive Inn and has the consistency of an M&M milkshake.         
Robin Eggs Malted Milkshake
2 c. vanilla ice cream
1/2 c. milk
1/2 c. crushed robin eggs (or a little more)
whipped cream

Add ice cream and milk to your blender.  Pulse until desired consistency.  Add crushed robin eggs (reserving some for garnish).  Pulse until blended.  Pour into a glass.  Top with whipped cream and remaining crushed robin eggs and serve immediately. Yield: one milkshake.


Jenn's Notes: I used low-fat vanilla ice cream and that's it - this was delicious!

Wednesday, March 28, 2012

Pumpkin Oatmeal Cookies for a Good Cause

Can you believe that I made it four whole months without making a pumpkin recipe?  I am a little shocked myself.  It's not that I haven't craved pumpkin, several times, it's just that I made myself make other recipes.  
Then, the other day, I had seen a few posts on various blogs about a family named the "Fishes".  Two of their daughters were born with a a very rare gene disfunction.  After seeing the Families Blog and watching this You Tube video, my heart melted.  What sweet and innocent and beautiful children and it breaks my heart that they have to go through this.  
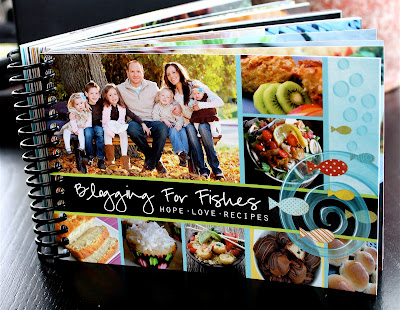
Ali from Lemon Poppy put together a great cookbook to help benefit the Fishes.  The recipes come from a group of bloggers, including some of my favorites, that have submitted their favorite recipes.

I purchased a .pdf copy of the cookbook for only $5.99 and 100% of the proceeds from the E-books will be donated to the Fishes.  

If you feel like you can spare $5.99, then you should purchase a copy of "Blogging For Fishes".  It is such a bright and colorful cookbook, full of many things that I can't wait to try.  


These pumpkin cookies were one of the first things that caught my eye and I immediately made them.  I think they are DELICIOUS.  They are very soft, yet chewy from the oats and they include my favorite spices!  Not to mention, they are made with wheat flour, so they are healthy, right?  I will be making these again and again.  I have already eaten three of them in the past hour - no lie!   


Pumpkin Oatmeal Cookies
adapted from: Blogging For Fishes

2 c. whole wheat pastry flour
1 tsp. baking soda
1 1/2 tsp. cinnamon
1/4 tsp. ginger
1/8 tsp. nutmeg
1/8 tsp. allspice (I didn't add)
1/8 tsp. cloves (I didn't add)
1/2 tsp. salt
1 c. butter, room temperature
1 c. brown sugar, packed
1 c. sugar
1 c. pumpkin puree
1 egg
1 tsp. vanilla
2 c. old-fashioned oats
1 c. chocolate chips (I added more)
1 c. dried cranberries (I didn't add)

Preheat oven to 350 degrees.  Line a baking sheet with parchment paper.  In a medium bowl, whisk together the wheat flour, baking soda, cinnamon, ginger, nutmeg, allspice, cloves and salt; set aside.  In a large bowl, cream together butter and both sugars until light and fluffy.  Add the pumpkin, egg and vanilla.  Beat until combined.  Gradually add the dry ingredients and mix until well incorporated.  Stir in the oats, chocolate chips and dried cranberries.  Drop dough by rounded Tablespoons onto prepared baking sheet.  Bake for 12 minutes or until lightly browned.  Cool on baking sheet for 2 minutes, since they will be soft.  Remove to wire rack and cool completely.

Jenn's Notes: I made a half of a batch and got 27 cookies.  The first batch, I didn't line my baking sheet with parchment and the cookies were pretty hard to get off the baking sheet.  The next batch, I used parchment paper and the cookies came off very easily, but they were slightly flatter than the first batch.  I baked for exactly 12 minutes and they were perfect.  I did not have wheat pastry flour, so I used regular wheat flour mixed with a few Tablespoons of cake flour (I read that was a substitute), however these cookies are so extremely soft, that I think using a full cup of regular wheat flour would work just fine.  I will try it next time and come back and update this post! DO NOT stack the cookies on top of each other to store them, they will end up sticking to each other.  I REALLY LIKE these cookies!    

Monday, March 26, 2012

Skillet Potatoes with Bacon and Parmesan Cheese

I was inspired by a picture I found on Pinterest that came from this blog to make these potatoes.  Instead of making my usual Twice Baked Potatoes to go along with my chicken for Sunday dinner, I decided to switch things up a bit.  A crispy potato dish was just what I was looking for.  This dish really is so versatile.  You can throw in whatever you have in your fridge or pantry.  Instead of parsley, you could add some dried rosemary or thyme.  You could throw in some smoked paprika and use Cheddar cheese.  You could use the same seasonings that were used in these spicy chili fries and have some spicy potato bites!  I was also thinking some Feta cheese would be amazing.  
Skillet Potatoes w/ Bacon & Parmesan Cheese
from: Jenn@eatcakefordinner
idea adapted from: here
(Printable Recipe)

3 russet potatoes
1/2 lb. bacon, diced
salt and pepper
2 Tbl. chopped fresh parsley
freshly grated Parmesan cheese
ranch dressing, for serving

Wash and dry potatoes.  Poke each potato with a fork a few times.  Wrap tightly in foil.  Bake in a 350 degree oven for 1 hour - 1 1/2 hours or until tender (really depends on how big your potatoes are).  Remove from oven and remove foil.  Allow to set for a few minutes or until cool enough to handle.  Use a sharp knife and carefully cut into cubes (the potatoes are very soft, so the slower you cut, the better).  I cut the potato in half lengthwise and then each half into thirds and then cut into cubes.  If you don't want to dice the potatoes, you could always just slice them into rounds instead.  Heat a large skillet over medium heat.  Add the diced bacon and fry until crisp.  Using a slotted spoon, remove bacon and set on a paper towel lined plate.  Reserve 1-2 Tablespoons of bacon grease in the pan.  Carefully add cubed potato pieces to the pan.  Season with salt and pepper.  Allow to cook for several minutes, without stirring, until potatoes are nice and browned and crisp.  Flip over and allow to brown on the other side.  Top with cooked bacon, chopped parsley and grated Parmesan cheese (as much as you like).  Allow the cheese to melt.  Serve plain or with ranch dressing.  Yield: 3-4 servings.      


Jenn's Notes: The key to crispy potatoes is to only flip them once.  Don't flip them until they are browned and crispy. I prefer these potatoes dipped in ranch dressing.      

Saturday, March 24, 2012

Pioneer Woman's Make-Ahead Muffin Melts

Have you guys all picked yourself up a copy of Pioneer Woman's New Cookbook?  I loved her first cookbook and I have almost made every recipe in it!  I couldn't wait for hew new book to come out.  I tried to talk my local Costco lady into giving me one early.  I even told her I would pay her double - ha ha, but she didn't think that was very funny.  So, I was first in line the day it came out.  


I have made these muffin melts before, but I had forgotten about them, so I was glad to see them in her new book.  It reminded me I needed to make them again.  


You can make the spread the night before, keep it in the fridge, then just spread it on the English Muffins and broil them when you are ready to eat!


These are the perfect thing to make with all those EASTER eggs you will have! 
Make-Ahead Muffin Melts
12 slices bacon, fried and crumbled
12 hard-boiled eggs, peeled and roughly chopped
2 c. grated Cheddar cheese
1 c. (real) Mayonnaise (I used light)
1 heaping Tbl. Dijon mustard, or to taste
1/2 tsp. garlic powder
5 dashes Worcestershire sauce
6 English muffins, split

Combine the chopped bacon, chopped eggs, cheese and the Mayonnaise in a bowl.  Next, add the Dijon, garlic powder and Worcestershire sauce.  Fold all the ingredients together and give it a taste.  Add more of whatever you think it needs, if needed.  Preheat your oven's broiler to low.  Spread a good amount of the spread on the halved English muffins.  Place them on a baking sheet and broil until the topping is hot and the cheese is melted, about 5 minutes.  Be careful not to burn them.  Serve.  Makes 12 melts.   

Variations:
-Add some finely diced onion and/or bell pepper
-Use Pepper Jack cheese instead of Cheddar
-Toast on a bagel half instead of an English muffin
-Spread on sandwich bread and add lettuce and tomato for a twist on egg salad  

Jenn's Notes: I have made these a few times.  I think they are good, but I think they would be better if you toast the English muffin first.  I like a little crunch!  I have used both full-fat and light Mayo and I think the light tastes just as good. They are good topped with green salsa, but they are so good topped with homemade regular salsa (I have the best recipe, I will post soon).   

Thursday, March 22, 2012

Baked Creamy Chicken Taquitos with Creamy Cilantro-Lime Ranch Dressing

This recipe isn't anything new.  I am sure you have all seen these a million times, but if you still have not tried them, then you really need to.  If you like big, bold and in-your-face flavors, then you will most likely really like this recipe.  I absolutely LOVE these taquitos and I could eat them at least once a week, if I would let myself.  The filling is creamy and seasoned with my favorite spices and to top it all off, you serve them with a creamy cilantro-lime ranch. Oh My Gosh - can I say sinful! 
Baked Creamy Chicken Taquitos
adapted from: Our Best Bites
(Printable Recipe)

1/3 c. (3 oz.) cream cheese
1/4 c. green salsa
1 Tbl. fresh lime juice
1/2 tsp. cumin
3/4 tsp. chili powder
1/2 tsp. onion powder
1/4 tsp. garlic powder
3 Tbl. chopped cilantro
2 Tbl. chopped green onions
2 c. cooked, shredded chicken
1 c. shredded Pepper Jack cheese
6-inch corn or flour tortillas
nonstick cooking spray
kosher salt

Heat oven to 425 degrees.  Line a baking sheet with aluminum foil and spray it lightly with cooking spray.  Heat cream cheese in the microwave for 20-30 seconds, so it's soft and easy to stir.  Add green salsa, lime juice, cumin, chili powder, onion powder and garlic powder.  Stir to combine and then add cilantro, green onions, chicken and cheese.  Wrap 3-4 tortillas at a time in damp paper towels and microwave for 20-30 seconds so they are soft and pliable.  If you find your tortillas are cracking when rolled, use damper paper towels and increase the microwave time.  Place 2-3 Tablespoons of the chicken mixture on the lower third of each tortilla, keeping it about 1/2 inch from the edges and then roll up.  Place seam-side down on the baking sheet in a single layer.  Spray tops lightly with cooking spray or brush tops with vegetable oil.  Sprinkle a pinch of kosher salt on top.  Place pan in the oven and bake for 15-20 minutes or until crisp and the ends start to get golden brown.   Serve with creamy cilantro dressing.  

Freezer Instructions: Place unbaked taquitos in a single layer on a baking sheet and place in the freezer for 2 hours or until frozen enough to hold their shape.  Pack in a freezer-safe container for up to 3 months.  To bake, follow the regular instructions, extending the baking time by 10 minutes.   

Jenn's Notes:  These get plenty crispy by baking in the oven!  I love everything about these!  I like mine with corn shells and Jake likes his on flour shells.  So, I make some of each.  I have not tried freezing these, but my friend said it works great! 

Creamy Cilantro-Lime Ranch Dressing
adapted from: Our Best Bites

1 packet (1 oz.) Hidden Valley Ranch Dressing Mix
    (ignore the directions on the packet)
1 c. Mayonnaise
1/2 c. milk or buttermilk
1 lime, juiced (about 2 Tbl. juice)
2 cloves garlic, roughly chopped
1/2 c. cilantro, roughly chopped
1/4 c. green salsa

Combine dressing mix, Mayonnaise, milk and lime juice.  Add the garlic, cilantro and green salsa.  Blend to thoroughly mix all the ingredients.  If possible, refrigerate for several hours to allow the dressing to thicken and the flavors to meld.  Makes about 2 cups.  

Jenn's Notes: I usually only make a half of a batch of this dressing!  

Monday, March 19, 2012

School Lunch Lady Rolls - No Mixer Needed - Plus How to Make Perfect Sized Rolls Every Time!

I knew as soon as I saw this recipe, that I had to try it.  It is supposedly a SECRET recipe from an elementary school.  I love secret recipes! It makes it that much more exciting to try. The instructions weren't very detailed, so I am not sure if what I did is exactly what you are supposed to do, but I guess it doesn't really matter, because they turned out DELICIOUS! I may or may not have already eaten four of them in one day. 
This is the easiest way to get perfect-sized rolls every single time (I got this technique from The Lion House). You don't even need a ruler!  Roll out dough.  I rolled mine out to be exactly two pointer finger's high.  Make an "L" with your hand and place it on the corner of the dough.  Using a pizza cutter, cut a horizontal line from the top of your pointer finger all the way across the dough.  Then, cut a vertical line all the way up from the tip of your thumb.  Then, move your hand and line up the corner of your "L" to the vertical line you just cut and cut another vertical line from the tip of your thumb up.  Repeat.  
See, perfect-sized strips the whole way across.  
Take a strip of dough and hold it straight up and down by the corners, swing it up and around towards you.  It will wrap around itself.  Place seam-side down on baking sheet.  Repeat with remaining dough, placing a few inches apart.  The top corners of the dough will stretch out a bit as you flip it and that is what makes the yummy little nubs on the end of the rolls.  If that doesn't make sense, you can always just roll up each strip of dough.       
Allow to rise until doubled.  
Bake.  Remove from oven and take a stick of butter and rub over the tops of the warm rolls.  So easy and so yummy! 

School Lunch Lady Rolls (No Mixer Needed)
adapted from: The Royal Cook

2 1/2 c. warm water
2 Tbl. active dry yeast
2/3 c. sugar
6 - 8 c. all-purpose flour
2 eggs, lightly beaten
1/3 c. shortening, melted
1 1/4 c. powdered milk
1 Tbl. salt

In a large bowl, dissolve yeast in warm water with the sugar; let stand 5 minutes or until frothy.  Add two cups of the flour along with the remaining ingredients.  Stir together with a wooden spoon until combined.  Stir in remaining flour, 1 cup at a time until a soft dough forms.  It will pull away from the sides of the bowl.  Use as little flour as possible, so your rolls will be soft.  Knead dough, by hand, just a few times in the bowl.  Cover and let rise until doubled.  Roll out to 1/2'' thick on a lightly floured surface.  Spread with 2 Tbl. softened butter.  Cut into strips and roll up.  Lay seam side down on greased baking sheet.  Cover and let rise until doubled.  Bake at 350 degrees for 15-20 minutes.  Remove from oven and brush tops with melted butter.  Yield: 32 large rolls.  

Jenn's Notes: I mixed the whole thing with only a wooden spoon!  I made a half a batch and I used around 2 1/2 cups of all-purpose flour and 1 cup of wheat flour.  The dough rolled out beautifully and was so easy to work with.  I got 16 large rolls and baked them for 20 minutes.  They are soft and buttery and have great flavor! Very yummy. They still taste great the 2nd day!    

Saturday, March 17, 2012

Orange Buttermilk Cake with Zesty-Sweet Curd Filling

I have a very serious question for you.
Do I have enough orange zest on my plate?  I think I could have fit a little more on there, don't ya agree? 

Ha Ha - I guess you could say I got a little carried away.
I couldn't help myself. I made this cake right after Valentine's Day and my Sweetheart had surprised me with all kinds of fun new kitchen gadgets, including a zester and a microplane grater.  

Up until then, I had been using the smaller side of my cheese grater to zest my oranges, limes and lemons.  I didn't think a microplane grater would be much different.  I was SOOOOOOO wrong.  That thing is my new favorite kitchen gadget.  It zests oranges PERFECTLY.  The blades are sharp and angled just right, so you don't have to worry about accidentally grating the bitter white part, because it won't let you go down that far.    You can grate a whole orange in a flash - seriously - go buy yourself an all-purpose microplane grater if you don't already have one.  I have even used it to grate fresh ginger and fresh parmesan cheese.  

Back to the cake . . . if you like the flavor of oranges, then I think you will love this cake.  It is loaded with citrus flavor, the cake is dense and moist and the frosting is soft and creamy.  It looks like a lot of work, but you can always make the curd a day or so ahead of time or just leave it out.  I love the flavor combo of Orange and Almond, especially since I first tried this Orange-Almond Biscotti
Orange Buttermilk Cake with Zesty-Sweet Curd Filling
adapted from: Cooking With Paula Deen (March/April 2012 Issue)
(Printable Recipes)

1 c. butter, softened
2 c. sugar
2 tsp. orange zest
1 tsp. vanilla extract
1/4 tsp. salt
4 large eggs
3 c. all-purpose flour
1 Tbl. baking powder
1/2 tsp. baking soda
1 1/4 c. buttermilk
Zesty-Sweet Curd Filling (recipe follows)
Orange Buttermilk Frosting (recipe follows)

Preheat oven to 350 degrees.  Grease and lightly flour 3 (9-inch) cake pans.  In a large bowl, beat butter, sugar, orange zest, vanilla and salt at medium speed with a mixer until fluffy.  Add eggs, one at a time, beating well after each addition.  In a medium bowl, combine flour, baking powder and baking soda.  Add flour mixture alternately with buttermilk, beginning and ending with flour mixture.  Divide batter evenly among prepared cake pans.  Bake for 20-24 minutes or until a toothpick inserted in the center comes out clean.  Cool in pans for 10 minutes.  Remove from pans and cool completely on wire rack.  Spread curd filling between layers.  Spread orange buttermilk frosting on top and sides of cake.  Store, covered, in refrigerator up to 3-days.  

Zesty-Sweet Curd Filling
*I did not make this recipe, instead I made 1/2 batch of this microwave curd recipe and used orange juice instead of lemon juice and I added 1/8 tsp. of almond extract.  I still wanted to post this recipe incase anyone wanted to try it.
1 1/2 tsp. unflavored gelatin
2 Tbl. fresh lemon juice
3/4 c. sugar
1 Tbl. orange zest
1/2 c. fresh orange juice
4 egg yolks
1/4 tsp. salt
1/8 tsp. almond extract
6 Tbl. butter, cut into small pieces

In a small bowl, sprinkle gelatin over lemon juice.  Let stand for 10 minutes or until softened.  In a medium saucepan, whisk together sugar, orange zest, orange juice, egg yolks, salt and almond extract.  Add butter and cook over medium heat, whisking constantly, until curd has thickened, about 8 minutes.  remove from heat and whisk in the gelatin mixture until smooth.  Transfer curd to a bowl and place plastic wrap directly on surface of curd; refrigerate at least 8 hours or until ready to use.  Yield: about 1 cup

Orange Buttermilk Frosting
1 c. butter, softened
1 tsp. orange zest
6 c. powdered sugar
3-4 Tbl. buttermilk, plus more if needed
juice of 1-2 oranges, to taste
1 tsp. vanilla extract
1/2 tsp. almond extract, opt.
orange food coloring paste, opt.

In a large bowl, beat butter and orange zest at medium speed with a mixer until creamy.  Gradually add half of the powdered sugar, beating until smooth.  Add buttermilk, orange juice, vanilla and almond extracts and beat until smooth.  Add remaining powdered sugar, beating until smooth.  Add more buttermilk if frosting is too thick.  Tint frosting with orange food coloring paste, beating to reach desired color.  

Jenn's Notes: I did not have 3 (9-inch) cake pans, so I divided the batter between two pans and baked them for 25-27 minutes.  I cut each layer in half, making four layers.  I only put curd filling over one layer and I actually preferred it WITHOUT the curd filling.  After sitting in the fridge for a few hours, the orange flavor intensifies and it is super orangey.  

Thursday, March 15, 2012

Baked Beans

I have told you that my father-in-law, Bob, makes the best baked beans I have ever had.  Better than any restaurant around.  I didn't even like baked beans until I tried his recipe and now I love them.  I am on a constant search to find a bean recipe as good as his.  I found a promising recipe a few weeks ago.  It comes from The Daily Smash and she says it is her Mom's recipe and she has never found another recipe she likes as much.  I even noticed one of the comments said that they couldn't believe she shared her Mom's yummy recipe! 

I thought these beans were absolutely delicious.  I used a different brand of baked beans than I usually use and I think it made a big difference in the taste.  The flavor did remind me of Bob's, so I am getting closer! 
Baked Beans
adapted from: The Daily Smash
1/2 Lb. bacon
2 Lbs. ground beef
2 c. chopped onion
1 c. chopped celery
2 beef bouillon cubes
2/3 c. boiling water
1 1/2 cloves garlic, minced
1 1/2 c. ketchup
1 1/2 tsp. salt
1/2 tsp. pepper
2 (28 oz.) cans Bush's Baked Beans 
   - Maple Cured Bacon flavor
   - Country Style flavor

Fry bacon and set aside.  Brown ground beef, onion and celery in a large pot and cook until vegetables are tender.  Dissolve the bouillon cubes in water and add along with the remaining ingredients, including the cooked bacon.  Mix well.  Cover and bake 1 hour @ 375 degrees.  Top with sour cream.  This freezes well.  

Jenn's Notes: I cut the recipe in half and I used one can of Country Style flavored beans.  I also added some diced green bell pepper.  Next time, I will try adding some sausage! Instead of baking this, I just let it simmer on the stove for a few hours.  This recipe was so good. 

Tuesday, March 13, 2012

Slow Cooker Honey Sesame Chicken

I have to say . . . this sounded like the strangest recipe to me, but I kept seeing it all over blog land.  How could ketchup, soy sauce and honey be good together?  I decided to read through the comments and shockingly everyone seemed to love this.  Comment after comment said I tried this and loved it, it's a new family favorite, it will be a weekly menu item and so on and so on.  Okay, either everyone is crazy or this must be really good.  I decided to go with everyone is crazy! Ha ha.  

I gave it a try.  

This stuff is DELICIOUS!  

It reminded me of the rice bowls from Teriyaki Bowl and Rumbi!  It was so EASY and I think kids will love it, as well as adults.  Like everyone else already said, this will become a frequent menu item.  
Honey Sesame Chicken
4 boneless, skinless chicken breasts
pepper
1 cup honey
1/2 c. soy sauce
1/2 c. diced onion
1/4 c. ketchup
2 Tbl. vegetable oil
2 cloves garlic, minced
1/4 tsp. red pepper flakes
4 tsp. cornstarch dissolved in 6 Tbl. water
sesame seeds

Season both sides of chicken with a little pepper.  Put in crock pot.  In a small bowl combine honey, soy sauce, onion, ketchup, oil, garlic and red pepper flakes.  Pour over chicken.  Cook on low 3-4 hours or on high 1 1/2 - 2 1/2 hours or until chicken is cooked through.  Remove chicken from crockpot, leave sauce.  Add cornstarch mixture; stir to combine.  Replace lid and cook sauce on high for 10 more minutes or until slightly thickened.  Cut chicken into bite size pieces and then return to pot and toss with sauce before serving.  Serve over rice or noodles and sprinkle with sesame seeds.  Serves 4 - 5  

Jenn's Notes: I cut the recipe in half and cooked it in the oven.  I used dried onion flakes and I used a small pinch of cayenne instead of red pepper flakes.  Once my chicken was baked, I removed it from the pan and cooked the sauce over medium heat until it was thickened.  Instead of adding the chicken back into the sauce, I tossed a little over each dish, because it made quite a bit of sauce and I didn't want it to drown my chicken!  I served with steamed broccoli, but I actually preferred the broccoli on the side.  I really am a big fan of this dish - I thought it was so yummy!

Sunday, March 11, 2012

Vanilla Bean Paste Winner Announced

Thank you so much to everyone who entered my Vanilla Bean Paste Giveaway!

I was shocked to read how many people have not heard of vanilla bean paste.  I love this stuff and everyone needs to have a bottle!  Don't worry if you didn't win, I will have another vanilla giveaway coming. 

The winner is . . . .

Comment #45 Briana Richardson 
who said. . . "I don't have a favorite yet"

Congratulations Briana!
Please contact me within 72 hours to claim your prize at eatcakefordinner@digis.net


Saturday, March 10, 2012

Homemade Oatmeal Cream Pies

I love Little Debbie Oatmeal Creme Pies and I'm not afraid to admit it.  

Like any other sweet treat, homemade is almost always better than store bought. I had seen a ton of versions of this famous treat and they all sounded great and the photos were all mouth-watering that it was almost too hard to pick one to try and that is why it took me so long to finally just pick one and give it a go!  

I went with the recipe that didn't have the most butter, but didn't have the least and I went with one that had all brown sugar, because brown sugar makes a super soft cookie and that is what I was looking for.  I decided to ignore all of the cream filling recipes and go with one of my favorite frostings.  It is the original recipe that I based my Whipped Eggnog Frosting off of.  It is the lightest frosting and it has a great texture and flavor.  I know it is different than the store-bought version, because I saw an episode of Unwrapped and it showed us that the real cream filling is made with shortening, powdered sugar, corn syrup and vanilla flavoring and they whip air into that.  Whichever type of filling you decide to go with, these will be delicious either way!  

I LOVED these Homemade Oatmeal Cream Pies!  
Homemade Oatmeal Cream Pies
3/4 c. unsalted butter, softened
2 c. packed brown sugar
2 eggs
1/2 tsp. salt
2 c. all-purpose flour
1 tsp. baking powder
1/2 tsp. ground cinnamon
2 c. quick-cooking rolled oats
2 tsp. baking soda
3 Tbl. hot water


Preheat oven to 425 degrees.  Lightly grease a baking sheet and set aside.  Cream butter and sugar until light and fluffy.  Add eggs and mix to combine.  In a separate bowl, sift together the salt, flour, baking powder and cinnamon.  Add to the creamed mixture.  Add the oats and mix until combined.  In a small dish, add the baking soda to the boiling water and stir into the rest of the batter.  Drop by the Tablespoon onto baking sheets, about 2-inches apart and bake until the cookies are just starting to turn golden around the edges, 8-11 minutes.  Cool the cookies on a wire rack.  Once completely cooled, spread vanilla frosting over flat side of one cookie and top with the flat side of another cookie.  Repeat.  Yield: around 44 cookies or 22 sandwiches. 

Jenn's Notes: I made a half a batch of both the cookies and the frosting.  I typed the recipe above with the measurements that I used.  The cinnamon is needed to help these taste like the store-bought ones, so don't leave it out.  I baked my cookies for 8-9 minutes.  (Remember you want them to be soft).  Don't judge the sandwiches the first night you make them, they really need to sit overnight in order to taste like a store-bought oatmeal cream pie.  They are delicious and I can't stop eating them!     

Thursday, March 8, 2012

Cheesy Chili Mac

Can you guys see that string of cheese attached to the spoon!  Is it making you crave some cheesy, creamy, flavorful macaroni?  It is?  Well, you should make this pasta!  It was really good and it was done in less than 30 minutes!  Perfect weeknight dinner.   

This dish is right up my alley! I love each and every ingredient, especially the corn. I love biting into corn and getting that burst of juicy goodness.  This dish had a special ingredient that gave it some amazing flavor and I can't wait to try it in other savory dishes.  It was brown sugar and it added a perfect richness to this dish. 
Cheesy Chili Mac
1 Lb. ground beef or turkey 
1/2 onion, minced
3 cloves garlic, minced
1 Tbl. chili powder
1 Tbl. ground cumin
1 Tbl. brown sugar
salt and pepper
2 c. water
1 (15 oz.) can tomato sauce
8 oz. elbow mac (about 2 cups)
1 1/2 - 2 c. Mexican cheese blend
corn, opt.
black beans, opt.
chopped cilantro, for garnish

Heat large skillet over medium heat; add the ground meat and cook until browned.  A few minutes before the meat is done, add the minced onion.  Add the garlic and cook for 30 seconds.  Add the chili powder, cumin and brown sugar.  Season with salt and pepper.  Add the water and tomato sauce; stir well to combine.  If adding the corn and beans, add now.  Add the uncooked noodles, cover pan and cook until noodles are done, stirring occasionally to prevent the noodles from sticking to the bottom of the pan.  Don't be afraid of adding a little extra water if needed.  Turn off heat and add the cheese; stir to melt.  Garnish with chopped cilantro.   

Jenn's Notes: I used ground beef, but I think ground turkey would be delicious too.  I added a mixture of Pepper Jack and Cheddar cheese instead of Mexican, because that is what I had.  I probably added around 1/3 - 1/2 cup of both the corn and beans.  I think 2 cups of pasta was too much and next time I would probably only add 1 1/2 cups.  This dish was creamy, flavorful and super yummy!    

Monday, March 5, 2012

Chicken Cordon Bleu Bread Bowls

What is going on with my font today?  Is it all messed up when you see it or is it just on my computer?  Sometimes I have to wonder - what is going on?


I wanted to get this recipe posted before it gets too warm outside?  Or, is it already too warm?  One day it is snowing and the next day it is warm and sunny.  Again, I have to wonder - what is going on?  Ha Ha.  I have had this recipe saved forever.  It sounded good and different, but I wasn't sure how you eat it?  It is not a soup, but it has a creamy sauce?  Do I eat it with a spoon as if it were a soup or do I rip apart the bread bowl and spoon the sauce on top?  That was my dilema, but I decided what the heck, I'm just going to make it and see how it goes.  

Mel over at Mel's Kitchen Cafe says this dish will knock your socks off and that it is beyond delicious.  Well, It didn't knock my socks off, but it was good.  I only had one little issue and it was the yellow mustard.  Next time, I will either omit the yellow mustard or use a little less.  Maybe a dijon would be better?  Jake sure liked it and he kept telling me how good it was.  By the way, I did kind of eat it like a soup and ripped apart the bowl as I went - The bottom of the bowl is the best part!    
Chicken Cordon Bleu Bread Bowls
adapted from: Mel's Kitchen Cafe
(Printable Recipe)

For the chicken and sauce:
4 Tbl. butter
1 Lb. boneless, skinless chicken breasts, cubed
    (about 2-3 chicken breasts)
1/2 c. minced yellow onion
2 cloves garlic, finely minced
2 Tbl. flour
1/2 c. apple juice
1 1/4 c. chicken broth
1/2 c. heavy cream 
1/4 c. freshly grated Parmesan cheese
2 Tbl. prepared yellow mustard
1 tsp. dried thyme
2-3 c. broccoli florets, steamed
salt and cayenne pepper, to taste


*Note: You can omit the apple juice and increase the chicken broth to 1 3/4 cups*


To assemble:
4 medium bread bowls
8-10 slices smoked deli ham, cubed
1 c. grated Swiss cheese
1/4 c. freshly grated Parmesan cheese


Preheat oven to 400 degrees.  In a large skillet, melt the butter over medium heat.  Add the chicken and saute until the chicken begins to brown, but isn't cooked all the way through, about 3-4 minutes.  Stir in the onions and garlic and cook, stirring often, until softened, about 2 minutes.  Sprinkle the flour over the chicken/onion mixture and stir to incorporate.  Cook, stirring constantly, for one minute.


Gradually add the chicken broth and apple juice, stirring constantly to avoid any clumps from forming.  Stir in the cream, Parmesan cheese, mustard and thyme.  Simmer for about 5-6 minutes or until the mixture is thickened and bubbly.  Stir in the ham and broccoli; season with salt and cayenne pepper to taste.  Remove from heat.


Hollow out the inside of the bread bowls by cutting off the tops and tearing out the insides.  I like to leave about 1/4-inch edge along all sides of the bread bowl.  Compress the remaining bread together to firm up the sides and make room for the filling.  Place the bread bowls on a baking sheet and toast them for about 5 minutes in the preheated oven.


Remove the toasted loaves from the oven and using a slotted spoon, divide chicken mixture evenly between loaves, reserving about 1-2 cups sauce in the pan for serving.  Top the chicken mixture in each loaf with shredded Swiss and a spirinkle of Parmesan cheese.


Bake the bread bowls until the cheese melts, about 10 minutes.  Serve each bread bowl with reserved cream sauce.


Jenn's Notes: I made a half a batch.  I didn't add the apple juice, I used milk instead of heavy cream and I used the whole can of chicken broth.  So, I ended up with more of a thin and brothy sauce, than a thick and creamy sauce.  Next time, I will omit the yellow mustard.    
i'am author of old country buffet coupons
that give mcdonalds coupons
breakfast coupons you also can find recipe from 
banana nut bread paula deen
almond roca