Friday, September 27, 2013

Potstickers

Potstickers no longer have to be intimidating.

I have made them a few times and they are actually super easy to make.  They do take a little time shaping each one, but it's a piece of cake.

The first time I bought the big square wonton wrappers and cut four rounds of out each piece.  This time I found already cut small wonton squares.  I got a little lazy and kept them as squares.  I added my filling to the middle, pinched two corners together, made my pleats and then folded over the top point.  They ended up looking pretty much the exact same as when I used circles, but it saved me a ton of time not having to cut each one.  I will do it that same way next time too.

These are seriously delicious and a must make.

Check out this awesome video tutorial to see how EASY it really is to shape your potstickers.

Serve alongside:
Easy Lo Mein
Copycat Panda Express Chow Mein
Potstickers
From: Jenn@eatcakefordinner
(Printable Recipe) or (Printable with Picture)

1/2 lb. ground pork 
3/4 c. coleslaw mix
1 Tbl. green onions, chopped
1 pkg. wonton wrappers, cut into circles

Sauce
1/4 c. soy sauce
2 Tbl. rice wine vinegar
1/4 c. brown sugar
1 tsp. sesame oil
2 tsp. fresh ginger, grated
1 clove garlic, minced
1 1/2 tsp. Sriracha hot sauce
1 tsp. Worcestershire sauce

In a medium bowl, combine the ground pork, slaw mix and green onions; set aside.  Whisk together all sauce ingredients and add 2 Tablespoons into the meat mixture.  Stir meat mixture together to combine all the ingredients.   Reserve the remaining sauce for a dipping sauce.   Fill a small bowl with a few Tablespoons of water; set aside.     


Use a cookie cutter and cut rounds out of wonton wrappers.  Keep remaining wonton wrappers covered, so they don't dry out.  Place 1 heaping teaspoon of filling into the center of each round.  Using your finger, dab a small amount of water along the outer edge of the wrapper.  Fold in half to seal in the middle.  Then, using your thumb and finger, fold three pleats on each side.  Repeat until all the filling is gone.  

To cook:  Heat 1 teaspoon of oil in a large non-stick skillet over medium heat.  Place 8-10 potstickers in the skillet and cover with lid.  Cook 2-3 minutes or until bottom is browned.  Remove lid and add 2 Tablespoons of water and immediately recover.  Allow to steam for 3-4 minutes or until meat is cooked through.  Remove potstickers and place on a baking sheet in a warm 180 degree oven while you cook the next batch.  Serve with reserved dipping sauce.  Makes 30-35 potstickers.  

*Check out this video tutorial with help shaping potstickers.

Jenn's Notes: I have also frozen these and they taste the exact same.  Place potstickers in a zip-top bag (before you cook them) and place in the freezer.  Thaw in the fridge and then cook the same way I listed above.   


Tuesday, September 24, 2013

Pumpkin Spice Cupcakes with Whipped Spice Frosting

These cupcakes are light and fluffy and have just a hint of pumpkin flavor and since they are so light, I wanted a light frosting to go on top.  My Whipped Spice Frosting is perfect and is as light as a cloud.  This stuff is so good you will have to practice some serious willpower to not eat the whole bowl with a spoon. . .

. . . Or you can do what I did and get the BIGGEST spoon you can find and enjoy every last lick.
I opted for mini cupcakes, so they can easily be popped in your mouth.  Hopefully, if you make these you have a mini cupcake pan that bakes at least 24 at a time.  70 mini cupcakes are a lot of cupcakes, but I'm pretty sure a lot of people would be very happy if you shared these with them, but I won't judge if you decide to keep them all for yourself :)
Pumpkin Spice Cupcakes
adapted from: Jamie Cooks It Up
(Printable Recipe) or (Printable with Picture)

1 box yellow or white cake mix
1 c. pumpkin puree
1/2 c. milk
4 eggs
1/3 c. vegetable oil
2 tsp. pumpkin pie spice

Whipped Spice Frosting
From: Jenn@eatcakefordinner
1 (3.4 oz.) box vanilla instant pudding
3/4 tsp. pumpkin pie spice, or to taste
1 tsp. vanilla extract
1 c. milk
1/4 c. powdered sugar
1 (8 oz.) carton Cool Whip (I used light)

For the Cake:  Preheat oven to 350 degrees.  Spray a mini muffin tin with cooking spray or line with paper liners.  Combine all ingredients and beat until smooth.  Fill muffin cups halfway full with batter.  Bake for 8 minutes or until top springs back when lightly touched and a toothpick inserted in the center comes out clean.  Cool completely and frost.  Yield: around 70 mini cupcakes.  

For the Frosting:  Combine dry pudding mix and pumpkin pie spice.  Add the vanilla and milk and beat until thickened.  Beat in the powdered sugar.  Gently fold in the Cool Whip until no streaks remain.  Refrigerate at least 30 minutes before piping onto cupcakes.  Refrigerate cupcakes.      

Jenn's Notes: I cut this recipe in half and I used a yellow cake mix.  I used a kitchen scale to measure out half of the cake mix and pudding mix and I saved the rest for another recipe.  

Friday, September 20, 2013

Baked Italian Sandwich

This is one of the BEST sandwiches I have had in a long time.  It tasted like something I would get at a sandwich shop and believe me . . . I would pay money for this one.  Incredible.

It even tastes just as good leftover.

I wish I could eat this every single day for lunch!

Nuff said.
Baked Italian Sandwich 
adapted from: Shugary Sweets
(Printable Recipe) or (Printable with Picture)

2 pkgs. crescent rolls
2 c. fresh spinach
1/4 lb. deli Genoa salami, sliced
Cheddar cheese, sliced
1/2 lb. deli black forest ham, thinly sliced
1/2 jar roasted red peppers, patted dry and chopped
2 Tbl. chopped green onions, opt.
1 tsp. dried oregano
1 tsp. Italian seasoning
S&P
4 eggs
1/4 c. Parmesan cheese, freshly grated
1/2 tsp. Johnny's garlic seasoning (or garlic powder) 

Preheat oven to 350 degrees.  Grease a 9-inch springform pan with cooking spray.  Unroll one package of crescent roll dough and line the bottom of the springform pan; pressing seams together to seal.  Layer with one cup of fresh spinach, followed by the salami, sliced Cheddar cheese (as much as desired), deli ham, roasted red peppers and green onions.  Top with remaining one cup of spinach.  Sprinkle with oregano, Italian seasoning, salt and pepper.  Beat three eggs with a fork and pour evenly over the top.  Sprinkle with Parmesan cheese.  

Last, unroll the remaining package of crescent rolls and cover top.  Pinch seams together the best you can.  Beat remaining egg and brush over the top of the crescent dough.  Sprinkle with Johnny's garlic seasoning.  Cover with foil and bake for 30 minutes.  Remove foil and bake another 30 minutes.  Remove from oven and allow to sit for 10 minutes.  Run a knife around the edge of pan and remove springform.  Slice and serve.  Serves: 4-6. 

*This can also be made in an 8x8-inch baking pan.  

Jenn's Notes: I made this exactly as I typed it above and it is Incredible.  It is also amazing leftover.

Wednesday, September 18, 2013

Ooey Gooey Pumpkin Revel Bars

I have had this recipe idea floating around in my head for quite.some.time.

If you have ever had Chocolate Revel Bars then you know how DIVINE they are.  I knew if I could create a pumpkin version that they would be DIVINE too.

I wanted a chewy base, not cakey, but pumpkin treats tend to lean toward the cakey side.  

I wanted an ooey gooey filling, but did I want chocolate, Nutella or butterscotch?

I decided to just go for it and see what happens.
Let me just tell you that these bars are way too ooey gooey to even think about being cakey.  They are thick and rich and the light whipped cream helps with the heaviness.  A small piece is plenty.

They really need to be eaten on a plate with a fork. 

This time around I went with a classic milk chocolate filling, but I do think Nutella would be divine and I love the flavor of butterscotch mixed with pumpkin.  So, feel free to switch it up.

I thought these were DELICIOUS :)
Ooey Gooey Pumpkin Revel Bars
From: Jenn@eatcakefordinner
(Printable Recipe) or (Printable with Picture)

2 c. all-purpose flour
2 c. oats
1 1/2 tsp. cinnamon
1/4 tsp. ground ginger
1/8 tsp. nutmeg
1/2 tsp. salt
1 tsp. baking soda
1 c. (2 sticks) unsalted butter, divided
1 1/2 c. light brown sugar, packed
1 large egg
2 tsp. vanilla
1 1/4 c. pumpkin puree

Gooey Chocolate Filling
1 Tbl. unsalted butter
1 (14 oz.) can sweetened condensed milk 
1 1/4 c. chocolate chips 
1 tsp. vanilla extract

Preheat oven to 350 degrees.  Line a 9x13-inch pan with parchment paper, leaving an overhang and spray with cooking spray.  These will rise to the top of the pan while they bake, so make sure to use a pan with at least 2 1/2-inch tall sides.  In a medium bowl, combine the flour, oats, cinnamon, ginger, nutmeg, salt and baking soda; set aside.  

Reserve one Tablespoon of butter for the filling and melt the remaining 1 stick and 7 Tablespoons in the microwave.  In a large bowl, whisk the melted butter and brown sugar until smooth.  Whisk in the egg, vanilla and pumpkin puree.  Add the dry ingredients and stir together until just combined; set aside.

For the Chocolate Filling: Combine the reserved 1 Tablespoon butter, sweetened condensed milk and chocolate chips in a medium saucepan over medium-low heat.  Heat until the chocolate is melted, stirring frequently.  Remove from heat and stir in the vanilla.  

To Prepare:  Spread 2/3 of the cookie dough into the bottom of the prepared pan.  Pour chocolate filling over the top and carefully spread out evenly.  Drop small spoonfuls of remaining 1/3 of cookie dough over the top.  Carefully spread out a little.  The dough will not cover the entire top.

Bake for 26-28 minutes or until top is browned and dough is set.  The filling will still look moist.  Cool completely before cutting into squares. Serve plain or with a dollop of whipped cream.  

Linked up at Weekend Potluck! and Inspiration Monday!

Warm Up Your Winter Winner Announced


Congratulations to . . . 

Jess

who said "I like mint best"

You are the random winner of the above book.  Please contact me within 72 hours or a new winner will be selected.


Sunday, September 15, 2013

Warm Up Your Winter GIVEAWAY plus Hot Vanilla with Peppermint Whipped Cream

**Giveaway has ended.  Click HERE to see the winner**
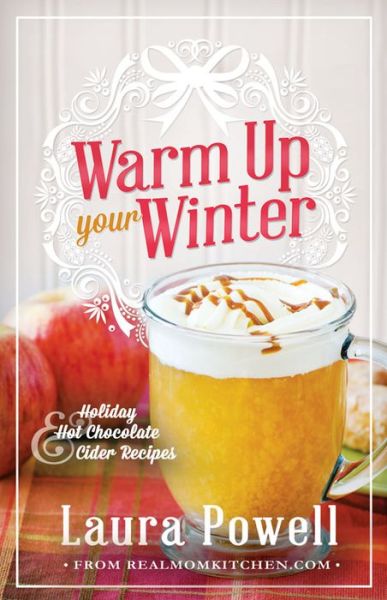
Warm Up Your Winter: Holiday Hot Chocolate and Cider Recipes      
Do you remember back when Laura Powell from Real Mom Kitchen released a cookbook?  I am lucky enough to own a copy of it and it's great.

She is at it again.  This time it isn't a whole cookbook, it is just a small pamphlet with hot chocolate and cider recipes.  All of the recipes sound amazing and it was hard to narrow it down.  I wanted to make the Salted Caramel Hot Chocolate, but "The Mr." convinced me to make the Hot Vanilla instead.

It is still pretty hot here in Utah, but luckily we had a few rainy days, so I was able to make this and pretend like it was a "chilly" day outside.  It tasted delicious and I loved it with the peppermint whipped cream on top.  That stuff is good.

Overall, the recipes in this little pamphlet sound delicious.  She includes quite a few variation ideas, mix-in ideas and topping ideas.  Hopefully, some day, Laura will come out with a full Holiday Cookbook, because I know she has so many amazing recipes.

  You can currently get this on Amazon for $2.99 or click HERE to find out other places where you can purchase it.
Hot Vanilla
adapted from: Laura Powell
(Printable Recipe) or (Printable with Picture)

1/2 c. whipping cream
1 Tbl. chocolate syrup
dash of cinnamon
6 c. milk
1/4 c. sugar
2 Tbl. vanilla extract
additional chocolate syrup, for garnish

In a medium bowl, whip the whipping cream until frothy.  Add chocolate syrup and cinnamon.  Continue to whip until firm peaks form.  Set aside.

In a saucepan over low heat, combine milk and sugar.  Cook until warm and sugar is dissolved.  Remove from heat and mix in vanilla.  Pour into mugs and top each mug with a dollop of the prepared chocolate cream and a drizzle of chocolate syrup, if desired.  Makes 6 (8 oz.) servings.

*Or, instead of the chocolate whipped cream, top with peppermint whipped cream.

Peppermint Whipped Cream
adapted from: Laura Powell
6 red-and-white peppermint candy canes
  or 24 mini candy canes
2 c. whipping cream

Unwrap candy canes and place them in a blender or food processor.  Process until they are a fairly fine powder.  In another bowl, whip cream until firm peaks form.  Fold the candy cane powder into the cream.  This will sweeten it.  Use immediately to top your cocoa if you like little pieces of crunchy candy cane or place in the refrigerator for 2 hours and allow the candy canes to dissolve.  

Note: This recipe also works well served on top of anything else that would taste good with peppermint (chocolate pie, cupcakes, brownies, etc . . . ).

Jenn's Notes: I prefer pretty sweet whipped cream, so I ended up adding 1 1/2 Tablespoons of powdered sugar to my peppermint whipped cream and it was delicious.

To ENTER the GIVEAWAY for one copy of this book (U.S. Residents Only):
1.  Simply leave me a comment on this blog post and tell me what your favorite hot chocolate topping or mix-in is. 

*If your name does not link me to a blog, be sure to leave me your email address, so I can contact you if you win.

Giveaway will end on on Tuesday, September 17th and I will announce the winner on Wednesday, September 18th.  Winner must contact me within 72 hours or a new winner will be selected.  Good luck.

The publisher provided me with a copy of this book for the purpose of this review, but the opinions expressed herein are my own.
Linked up at Inspiration Monday!

Wednesday, September 11, 2013

Secret Ingredient Snickerdoodle Muffins

 
Words can't even describe how tasty these muffins are.

I was originally going to call these cinnamon swirl muffins.  Pretty boring, right?  Then, when "The Mr." saw these he said mmm . . . Snickerdoodle Muffins?

They totally look like snickerdoodles.  The top looks kinda cracked and it's coated in cinnamon and sugar and they actually taste like a snickerdoodle too.  

All I knew was I really wanted some kind of cinnamon muffin to serve with my awesome homemade peach jam.
These were perfect.

The secret ingredient is the ricotta cheese.  I know it sounds strange, but it produces an amazing muffin with a perfect crumb and they stay fresh for several days.  The base recipe is one of my favorite muffin bases ever.  You gotta try it to believe it.   
Secret Ingredient Snickerdoodle Muffins
From:  Jenn@eatcakefordinner
(Printable Recipe) or (Printable with Picture)

2 c. all-purpose flour
1/2 tsp. baking powder
1/2 tsp. baking soda
1/2 tsp. salt
1/2 c. unsalted butter, room temperature
1 c. sugar
1 c. ricotta cheese (whole or low fat)
1 egg
1 1/2 tsp. vanilla

Cinnamon Sugar Topping
3 Tbl. brown sugar
2 Tbl. sugar
1 tsp. cinnamon

Preheat oven to 350 degrees.  Line a 12-cup muffin tin with paper liners and spray with cooking spray.  Combine flour, baking powder, baking soda and salt; set aside.  In a medium bowl cream together butter and sugar until fluffy.  Add ricotta cheese and beat until smooth.  Add the egg and vanilla and beat until combined.  Add the dry ingredients and mix until just combined.  Batter will be very thick.  Combine all cinnamon and sugar topping ingredients in a small bowl.

Fill muffin cups 1/3 of the way full with batter.  Top each with 3/4 teaspoon of cinnamon and sugar mixture.  Top with more batter, filling cups 3/4 of the way full.  Using a toothpick slightly swirl the batter with the cinnamon and sugar.  Top each muffin with 1/2 teaspoon of cinnamon and sugar mixture.  Bake for 23-24 minutes or until a toothpick comes out clean.  Yield: 14-15 muffins.  


Base muffin recipe adapted from: Two Peas and Their Pod
i'am author of old country buffet coupons
that give mcdonalds coupons
breakfast coupons you also can find recipe from 
banana nut bread paula deen
almond roca